Tag: administration

  • Trial & Error: Understanding Dynamics 365 CE Trials

    Trial & Error: Understanding Dynamics 365 CE Trials

    With SaaS products like Dynamics 365, getting the process of running a free trial right is crucial for the commercial success of products. This is why you may have seen Microsoft also perform a lot of changes into the process how you’ve been able to spin up trials of CRM Online instances, nowadays known as Dynamics 365 Customer Engagement. Or “Dynamics 365 for X”, with the “X” being an App like Sales, Customer Service, Field Service or Project Service.

    This App model is one of the reasons why the seemingly simple process of provisioning a new cloud database to host your CRM trial data has turned into a bit of a beast recently. It’s no longer a one-size-fits-all offering, rather Microsoft is trying to tailor the trial experience based on the business process that is most relevant for the potential customer. The intentions are good, but the results can lead to a lot of confusion when dealing with an inherently complex platform like XRM where users never follow just a single track through a few predetermined use cases. Here’s a few notes on what I recently learned about how the trials currently work.

    Classic Trials

    If you’ve been working with Dynamics 365 recently, either by deploying it for customers, managing your internal instances or studying to become a certified Dynamics 365 professional, you’ve probably encountered this selection:

    Here you get an option to select either one of the Apps, go for the full suite of “all of these”, or if you’re really paying close attention, skipping the App selection by ticking the box “none of these, don’t customize my organization”. Today when I was in need of setting up a new trial to test the Sales related features specifically, I opted to install the Sales App via this provisioning screen.

    After a short while, I was able to access this new trial instance. That in itself can of course be a challenge, since there’s no guarantee that the Office 365 App launcher or the home.dynamics.com screen will refresh to show you the link to the Dynamics 365 instance. Knowing the direct URL of the instance picker (https://port.crm4.dynamics.com/G/Instances/InstancePicker.aspx in EMEA) speeds up this process, and soon I was faced with the Sales specific clean app list. My Finnish language “Myynti” app for the legacy web UI was there, as was the less elegantly named “Sales-keskus” hybrid of English/Finnish, which of course points to the Sales Hub based on Unified Interface.

    Since I needed to do some solution installation here, the first thing I had to do was to promote myself to the Admin role. That’s something you’d never need to do outside of the trial experience, as being the user who provisioned the Dynamics 365 instance you’d most likely have sufficient roles in the Office 365 administration side to see the admin menus directly here. But these are trials we’re talking about and the whole point of the tailored experience is that you DON’T see things that are not relevant to you, because that’s a scary UX for people not familiar with the platform.

    Now that I had the power to configure the instance to my liking, I proceeded to first checking out the default UI on the account form. Here I noticed that actually my nice’n clean Sales UX was cluttered with stuff that I didn’t ask for. Taken from the English UI here, you’ll notice that the account form tab actually has sections for Project Price Lists, Field Service and Scheduling. Not to mention the related records navigation that was at least 20 items long. Where did my sleek Unified Interface “Sales Hub” go?

    When going to the Solutions menu, it’s obvious where these items are coming from. The “Sales trial” in fact contains in total 16 solutions, which is equivalent to choosing the “all of them” option on the trial setup screen. It’s all here, even though you didn’t ask for it: Customer Service, Field Service, Project Service and their accompanying trial customizations. No, none of these will actually show up as installed solutions for the instance if you view them via the Dynamics 365 Admin Center. The same laws of physics obviously don’t apply for trial instances as they would for actual production or sandbox instances. (more…)

  • From AppSource to Solutions to Dynamics 365 Apps

    From AppSource to Solutions to Dynamics 365 Apps

    In my previous blog post I presented the various different meanings that an App can have in Dynamics 365 Customer Engagement. Now that we’re aware of this jungle, let’s grab a machete and start making our way deeper into the heart of it, to understand how a system customizer can survive in there.

    Before there was Microsoft AppSource for Dynamics 365, the methods available for distributing apps in a generic sense were pretty basic: you downloaded a zip file (or several) from a location provided by some party, then navigated to the solutions menu in your XRM environment and started importing them. When there were updates to those apps, you needed to repeat the procedure. If there were some other configuration steps needed in getting the application properly set up, you had to read the friendly manual and complete those. In a more tech savvy environment the Package Deployer might have been used here, but that was hardly a task for the accidental CRM administrator.

    What AppSource aims to change in the Dynamics 365 app distribution process is similar to what the smartphone app stores did a decade ago, i.e. simplify the steps for the customer and also provide a better channel for app developers to deliver their updates. When you go to AppSource and choose to either install a free App or start a trial on a paid one, the next screen will provide an instance selector to determine where in your Office 365 tenant you want to put this App in. Also presented are the checkboxes for agreeing on both Microsoft’s as well as the ISV’s legal terms.

    From here you’ll be taken into Dynamics 365 Administration Center. This part of the process nor the UI of the admin center isn’t very intuitive, so let’s pause here for a moment. While you’ll land on the Solutions view of an Instance after clicking on “Agree”, on the logical level we should be paying attention to the Applications tab instead. The chosen ISV (or MS) App will have been added as a row in the applications list, which applies to the whole tenant. In this example we see that North52 Business Process Activities is now available in our tenant. It doesn’t have any configuration options in this UI, but the Microsoft apps like Portal Add-on or Voice of the Customer both have an additional “Configure” button that is accessed via this Manage Applications screen.

    If we click back to the Instances tab in the admin center, select one of our instances and click the Solutions icon on the right side, we’re now presented with the list of solutions available to this instance via the AppSource delivery channel. It is not the same as going to your XRM instance and clicking Settings – Solutions, as there can be more solutions within that instance. For example, the organization specific solutions that you’ve created as a container for your own customizations. Not even the managed/unmanaged status of those solution has anything to do with what’s shown in the admin center, because whatever zip files you imported directly into your XRM instance as a solution is only visible from within the XRM UI.

    The solutions list in the admin center is also different in the way that it shows also the solutions you haven’t installed in the instance. These are applications that someone, either MS or your D365 admin, has made available in your tenant and possibly installed them into some other instance (a test sandbox, for example). To get them installed you don’t have to go to AppSource, rather you can start the process from here.

    What makes this view so relevant for the Dynamics 365 instance administrator is that here’s where you’ll see what solutions have upgrades available. In the above example, Microsoft has released a new version of the Relationship Insights solution. Since they don’t want to accidentally break your dev/test/production orgs by changing the solutions on their own, they are rather giving you the controls to click on the “Update” icon for the particular instance when you’re ready for it. This same process is applied also for third party ISV solutions to deliver updated versions of their apps.

    Now when we have deployed the app from AppSource and the Solutions view in the Dynamics 365 Administration Center for our chosen instance shows the status as “installed”, let’s use the Office 365 app launched to navigate to our Dynamics 365 start page, meaning home.dynamics.com. And… there’s nothing new here. Even if we click the “Sync” button to refresh the My Apps view, our AppSource app doesn’t appear. What gives?

    At this point we need to take a step back from the UI and think about how these different components relate with one another. On the highest level we have AppSource, which is more of a marketing UI for products. From there we get Applications into our Dynamics 365 Administration Center. These manifest themselves as single solution rows for an instance when viewed via the admin center, but they can actually contain N separate solution files (look at Dynamics 365 Portals, for example). Finally, these solutions may or may not contain Apps – from 0 to N. This diagram illustrates these four conceptual levels and their relationships:

    In our example we’ve installed North52, which is an administrator/customizer tool designed for “building simple or complex business rules using point-click editor, eliminating C# and JavaScript coding”. In short, it’s an app for configuring apps, but it’s not a business app in itself. That doesn’t mean it wouldn’t need a UI, of course, but the Command Bar shortcuts and the dedicated home page web resource with navigation options quite frankly is much better suited for this type of a power user tool than the new Unified Interface apps that are supposed to work even on 4″ mobile phone screens.

    This brings us back to the App Module concept that was briefly mentioned in my earlier blog post. Before V9 and the Unified Interface there wasn’t so much benefit in building separate Apps for different functional areas of the XRM platform, as we had the one master UI for the instance available anyway. When the features are migrated over to the new Unified Interface, basically everything must be an App. In v9.0 we’ve yet to see how the more complex admin features will be implemented as Unified Interface versions, so currently it’s a somewhat jarring experience of 2011 meets 2018 for the system customizers.

    Even when all the actual business application functionality has moved over to Unified Interface, there will still be many scenarios in which presenting an AppSource app as a Dynamics 365 App Module App doesn’t necessarily make any sense. UI extensions like Checklists will not have much use outside the actual business entity in which they are used. Any app that connects to an external web service to enrich the contents of Dynamics 365 records mainly needs a configuration admin UI somewhere. Sure, there’s nothing stopping developers from using the App Designer to define an App for their solutions, since all you technically need is a single HTML web resource to publish an App with a single menu item. However, separating the tool from the XRM instance in which it lives isn’t going to make the UX of configuring features any easier, so I’m not really hoping for the app clutter to increase this way.

    Both the AppSource marketplace and the App Module in Dynamics 365 Customer Engagement provide significant improvement on how the business application features can be presented to business users and decision makers. What they don’t do is completely remove the need for Dynamics 365 system administrators to understand how the various layers and parts of the application platform are wired. XRM will likely remain an environment that’s just inherently more complex than an iPhone screen with its pretty app icons lined up just the way the single device user likes to see them.

  • Configure Outlook Contact Synchronization Settings on Behalf of Your Users

    The ability to get your CRM contacts automatically synchronized to your Outlook address book and mobile phone is a very handy feature in Microsoft Dynamics CRM. Why would you ever manually dial the phone numbers of your customers when you can just set them to appear in your smartphone’s list of contacts? Wouldn’t it also be nice to see the customer’s name instead of just an unfamiliar phone number when he or she calls you after your first meeting? These are examples of everyday benefits that not only save time but can also help drive CRM user adoption by showing tangible benefits of having the customer information managed centrally in a database shared by all employees that are in contact with the customers.

    The new server-side synchronization in CRM 2013 has made the synchronization process independent of the Outlook client, so that updated information flows between your phone and CRM even when your PC is not online. What has not changed, though, is the lack of an administrative control panel for configuring the synchronization settings for the users. Since CRM by default only offers API calls to manipulate the synchronization filters, most users are likely using the default synchronization settings that come with CRM out of the box (unless they’ve received thorough training on how to configure the filters in the personal options menu). These are not always the optimal way to get the most benefit out of the synchronization functionality.

    Once again, XrmToolBox comes to the rescue with its recent Sync Filter Manager addition. This tool gives system administrators the power to create and change the Outlook and offline filters on behalf of the end users. Now you can easily plan the proper synchronization strategy and deploy the correct settings to all users in a controlled manner, instead of needing to visit their PCs or try to get everyone to click the right options.

    Since the concept of synchronization filters and templates may not be so easy to grasp for the CRM admin, I decided to make a tutorial that walks you through a few common scenarios for contact management. These cover enabling more than just the single owner of a contact to have the record synchronized to their address books, as well as how to avoid users in administrative roles from getting thousands and thousands of miscellaneous contacts suddenly appearing in their Outlook and mobile phone. You can view the presentation below or go to SlideShare my Slides archive and download it from there if the embedded slides are not showing up.

    As a great follow up reading, I recommend you to also have a look at the article on contact management best practices that was recently published in the new CRM Virtuosity blog. This will show you how to take the Outlook contact synchronization even further via modifications to the contact form’s Command Bar in CRM 2013, among other things.

  • Spring Cleaning for Your Dynamics CRM System

    CRM systems have a tendency to suffer from an increasing amount of entropy as time goes by. Not only does the rate of accurate information available from them decrease as data quality decays over time (especially if no one’s in charge of actively maintaining it), they’re also susceptible to a phenomenon I’d describe as “the illusion of having data”. This is the assumption that simply defining a data model that holds a place for specific attributes or entities would actually result in data being collected into them.

    “Build it & they will come” could be translated to “customize it & they’ll use it” when it comes to CRM systems and it is as good a strategy in designing business information systems as it is in any other walks of life – meaning not very. Sure, during the initial requirements specification phase for a CRM system it may feel like there has to be a field added to the customer’s profile for every possible variable that the business may need in the future. After having used the system for a while you’re very likely to be confronted with the reality that very few if any of the records have any data entered into these fields. Or even worse: you just continue to assume to have customer information that doesn’t really exist, potentially building further process automation and reporting on a very shaky foundation.

    CRM_spring_cleaning_4
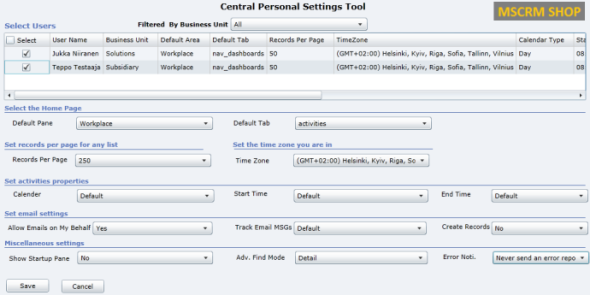
Since it’s quite a common phase in the lifecycle of a Dynamics CRM organization to sooner or later face a situation where you want to clean up the system from legacy data structures that no longer serve their purpose, I want to highlight a couple of tools that will help you on this journey towards a better organized CRM system.

    Finding Fields Not on Forms

    Persons who may get assigned the role of being the CRM system administrator alongside their “actual work” often approach the application as if it would consist of a set of forms that contain fields and… well, nothing much else. What this means in practice is that whenever a new business requirement comes up where additional information should be captured to serve a new process, product, organization structure or what have you, they’ll typically open either the account or contact entity and start adding new fields onto the forms.

    As this process is repeated over and over again, the number of fields will grow and at some point some of the older ones will probably get removed from the form in an effort to make the system less cluttered. They’ll most likely be left in the system with their Searchable property still set to “Yes”, meaning using Advanced Find can become a nightmare with all the legacy fields listed. Also system views may still be using these fields that can no longer be edited. With the number of fields growing every day, it can simply become overwhelming to identify what’s in use and what’s not.

    A good first step for finding the legacy data structures is to list the fields that are no longer used on any forms of the entity. Since Dynamics CRM by default does not offer tools for such analysis, the next place you should look for a solution is the community tools on CodePlex, starting from the nr. 1 toolkit for a CRM customizer, which is of course XrmToolBox. As it so happens, there’s yet again a tool in there that will help us in achieving our goal. The Metadata Document Generator offers a setting that allows us to export a list of attributes for the selected entities that are NOT contained in any of the forms (remember that there can be more than one per entity).

    CRM_spring_cleaning_2

    By choosing this setting and complementing it with the “include Valid for Advanced Find information” checkbox we can generate Excel sheets per each entity that list the unused fields, at least when it comes to the UI side of things.

    Finding Fields With Little or No Data

    Once we’ve spotted the fields that have potentially become redundant and we’d like to get rid off, the next question in our minds is likely to be how to verify whether there is any actual data stored in them that should be preserved. Similarly, just because a field is present on a form, that hardly proves that it would be populated for the records in the CRM database. These are the kind of questions that we can’t answer via metadata alone, instead we’ll have to dive into the actual data itself.

    A quick way to examine the usage of specific fields without any custom tools or solutions is to use the built-in charts feature of Dynamics CRM. Let’s say we want to see if our users have actually entered data into the “No. of Exployees” field on the account form. By moving to a suitable view like “Active Accounts” (with a suitable filter to remain under the Aggregate Query Limit in terms of number of records), expanding the chart pane on the right side and clicking on the plus icon, we can start to define a new chart to help us in our ad-hoc data analysis needs. For the series we should choose a field that is populated for all of the records (I always use the record GUID field, meaning for the account entity I’d choose the “Account” field). In the category section we’ll then select the field on which we want to analyze the distribution of the data. While we can’t show exact percentages in the Dynamics CRM charts, the good ol’ pie chart visualization will quickly tell us the rough share of records with a “(blank)” value.

    CRM_spring_cleaning_1

    We don’t even need to save our charts to perform the analysis, since in many cases the live preview in the chart editor mode will already tell us how big a piece of the pie goes to blank values. By leaving our mouse cursor in the Category picklist and pressing the up/down arrows we can quickly scroll through different fields and view the distribution of values.

    While this works for a reasonable amount of fields, it doesn’t necessarily produce a very good overview of the level of entropy in the CRM organization unless you write down these statistics manually onto an Excel sheet. To increase our performance in this task we can again look for a community provided tool to help us out.

    Scanning Your Entities for Unused Fields

    Paul Way has created a solution that fits the bill perfectly: CRM Data Detective. By uploading this solution into our CRM organization and simply navigating to [YourCRMorg]/WebResources/way_/detective/detective.htm we can choose any entity in the system and have its database contents analyzed by the Detective. The end result will be a list you can quickly scroll through and view the bar chart for the population rate per each attribute:

    CRM_spring_cleaning_3_small

    This will be a great tool for you in the discussions with business decision makers who’ve originally demanded the fields to be added into the CRM data model. If you’ve got fields on an entity that have a 2% utilization rate, chances are your system would become more valuable by removing such fields. The overall usability of your CRM environment would increase and you also wouldn’t need to suffer from the illusion of having certain data available, just because someone had once created a place for it in the CRM data model.

  • Your Essential Toolkit for Microsoft Dynamics CRM

    You can do a lot with the configuration and customization toolkit that Microsoft Dynamics CRM offers. With the SDK and some lines of custom code, you can do almost anything. There in between lies the territory where the Dynamics CRM community is helping its members manage some of the commonly required tasks without the need for .NET developer resources. This is done through a wealth of wonderful, free tools that make it easier for anyone working with Dynamics CRM to access the power of the platform without getting their hands dirty in tweaking XML files or learning the right SDK calls.

    Many of the tools listed here are a permanent fixture I take along with me to any consulting gig, while some are new entrants to the list. If you’ve been actively reading up the posts on various popular CRM blogs, you may well recognize most of them. However, while I personally spend far too much time on social media channels, I realize that not everyone in the industry has the luxury for such a lifestyle and may have therefore missed out on some tools that could have saved them hours worth of work. Therefore, I decided to compile a “Best Of” post to highlight the 10 tools no CRM consultant should be without. (For anyone wanting to stay on top of the latest tools and solutions I come across, you can either subscribe to my Dynamics CRM Links RSS feed or follow the Surviving CRM page on Google+.)

    CRM 2011 User Settings Utility

    Download from CodePlex.

    When setting up new user accounts in your Dynamics CRM organization, wouldn’t it be nice if the system administrator could set their personal settings to match the policies of the organization as well as the likely preferences of the user in question? Things like Time Zone, Records per Page, Advanced Find mode, default home page etc. can be easily configured for users in bulk with the CRM 2011 User Settings Utility by Amreek Singh.

    CRM2011_User_Settings_Utility

    One particular pet peeve of mine related to the default configuration of Dynamics CRM is that new contact records are automatically created from tracked email sender or recipient addresses not found in the database. Well, with this tool you can stop the users from unintentionally populating your database with partially filled contact records not associated to their proper parent accounts by simply configuring the setting to “No” for all users. Beats having to send everyone instructions by email on how to check their CRM profile settings, doesn’t it?

    Universal Settings

    Download from Sonoma Partners website.

    It’s not only the user settings that may require you to pop the hood open on your CRM instance. There is a number of Organization Settings as well as Deployment Settings that can be used to either overcome limitations or alter the default behavior of Dynamics CRM. For example, if you’d like to be able to export all of your contacts records from CRM to Excel and not just the first 10,000 then you’ll be happy to know that changing the MaxRecordsForExportToExcel parameter is a breeze with Universal Settings, no matter if you have an on-premises or CRM Online environment.

    UniversalSettings

    Another handy limit you can adjust with the tool is AggregateQueryRecordLimit, which will allow your charts to summarize more than 50,000 records at a time, instead of seeing “the maximum record limit is exceeded” errors. Also very handy if you wish to work with more than 50,000 marketing list members in your campaign target group. Unfortunately this tweak is not available for CRM Online, though, as the setting resides in the deployment table rather than the organization table, which is the only one you can update in the cloud.

    XrmToolbox

    Download from CodePlex.

    We’re now stepping into the world of “Mr. CRM Tools” himself, a.k.a. Tanguy Touzard. His awesome Toolbox for Dynamics CRM 2011 is a collection of the various tools developed over the years to help make Dynamics CRM administration and customization more efficient and enjoyable. By downloading the Toolbox you’ll get a number of great tools, but just to ensure you understand why you need them, let me give a quick intro to my favorite ones.

    Sitemap editor

    Adjusting the CRM main page navigation (a.k.a. sitemap) is something that you should always perform after you’ve determined what are the entities your different user groups (sales, marketing, etc.) will need to access and what is the logical arrangement of them in the navigation. Trust me, the right answer is not “the order in which the entities were created” nor “alphabetical”. There’s a number of free sitemap editor tools out there, but since XrmToolbox is such a powerhouse, it makes a lot of sense to use the the same tool that you’ll be using for other tasks in the same organization, as you’ll only need to configure the connection parameters once.

    Sitemap_editor

    Re-arrange, add, hide, group, rename, do basically whatever you want with the CRM menus with this editor without ever seeing a trace of the solution XML file contents.

    Easy Translator

    Easy_translatorThe latest addition to XrmToolbox is something every CRM admin from a non-English speaking country can surely appreciate. Since most of us still prefer to use the English base language setting in Dynamics CRM due to the awkward terminology of our native language translations in the customization UI (and any potential technical compatibility quirks that come with it), working with the “export/import labels for translation” process is all too familiar to us. Hunting down those strings in the unstructured output file isn’t very pleasant, which is where Easy Translator comes in handy. You’ll get a nicely arranged Excel with just the types of labels you’ve selected for export, which reduces the amount of trial & error in translating fields, values and form labels to the language of your choice. (more…)