Last week I came across an article on LinkedIn, where someone was saying “the time for Social CRM is upon us, thanks to COVID-19 changing the customers’ behaviour, and here’s a CRM system that you should use for managing it” (I’m paraphrasing). What caught my eye in the text was the references to the writings of Paul Greenberg, the semi-official godfather of CRM, in the 4th (and last) edition of his bible “CRM at the Speed of Light”. Released back in late 2009, the 700 page worth of content are probablt too much for anyone but the most hardcore CRM fans to consume at this point, but Paul’s blog post “Time to Put A Stake in The Ground on Social CRM” certainly is worth revisiting even in 2020.
Of course those who have followed Paul’s writings over the years may remember that he made the decision in 2013 to drop the “Social” from Social CRM and just call it CRM once again. The reasoning behind it was just as sound as was the original text laying out the definition of SCRM. I want to emphasize that I don’t consider the era of Social CRM from 2008 to 2013 to be a mistake of any sort. What I did find a bit awkward is the idea of selling any suite of software as the platform for “Social CRM” in 2020, since what Paul Greenberg wrote already back in 2009 for his Stake in the Ground article is still very much valid:
“When you look at the SCRM applications out there – there are no actual SCRM suites, no matter what the claims of any company on either the CRM or social tools side. What you do have are effective and important applications that increase the ability of employees to interact with customers – though they are not tools that facilitate the actual interaction. You also have the integration of social media and community building tools with traditional CRM tools which are providing effective combinations which are leading toward SCRM. I want to emphasize. These are all good tools. They are worthy of any company’s consideration. There is just no SCRM suite out there – as of yet or in the near future. Which doesn’t matter one iota.”
In the same vein as you can’t simply “do CRM” by just deploying a CRM software suite while skipping the strategy part and business process implementation, Social CRM was never about waiting for a version of your CRM suite to arrive that included the missing social module. This is not a radical piece of insight by any means but rather common sense – something that needs to be stated also on a technical blog like mine every now & then.
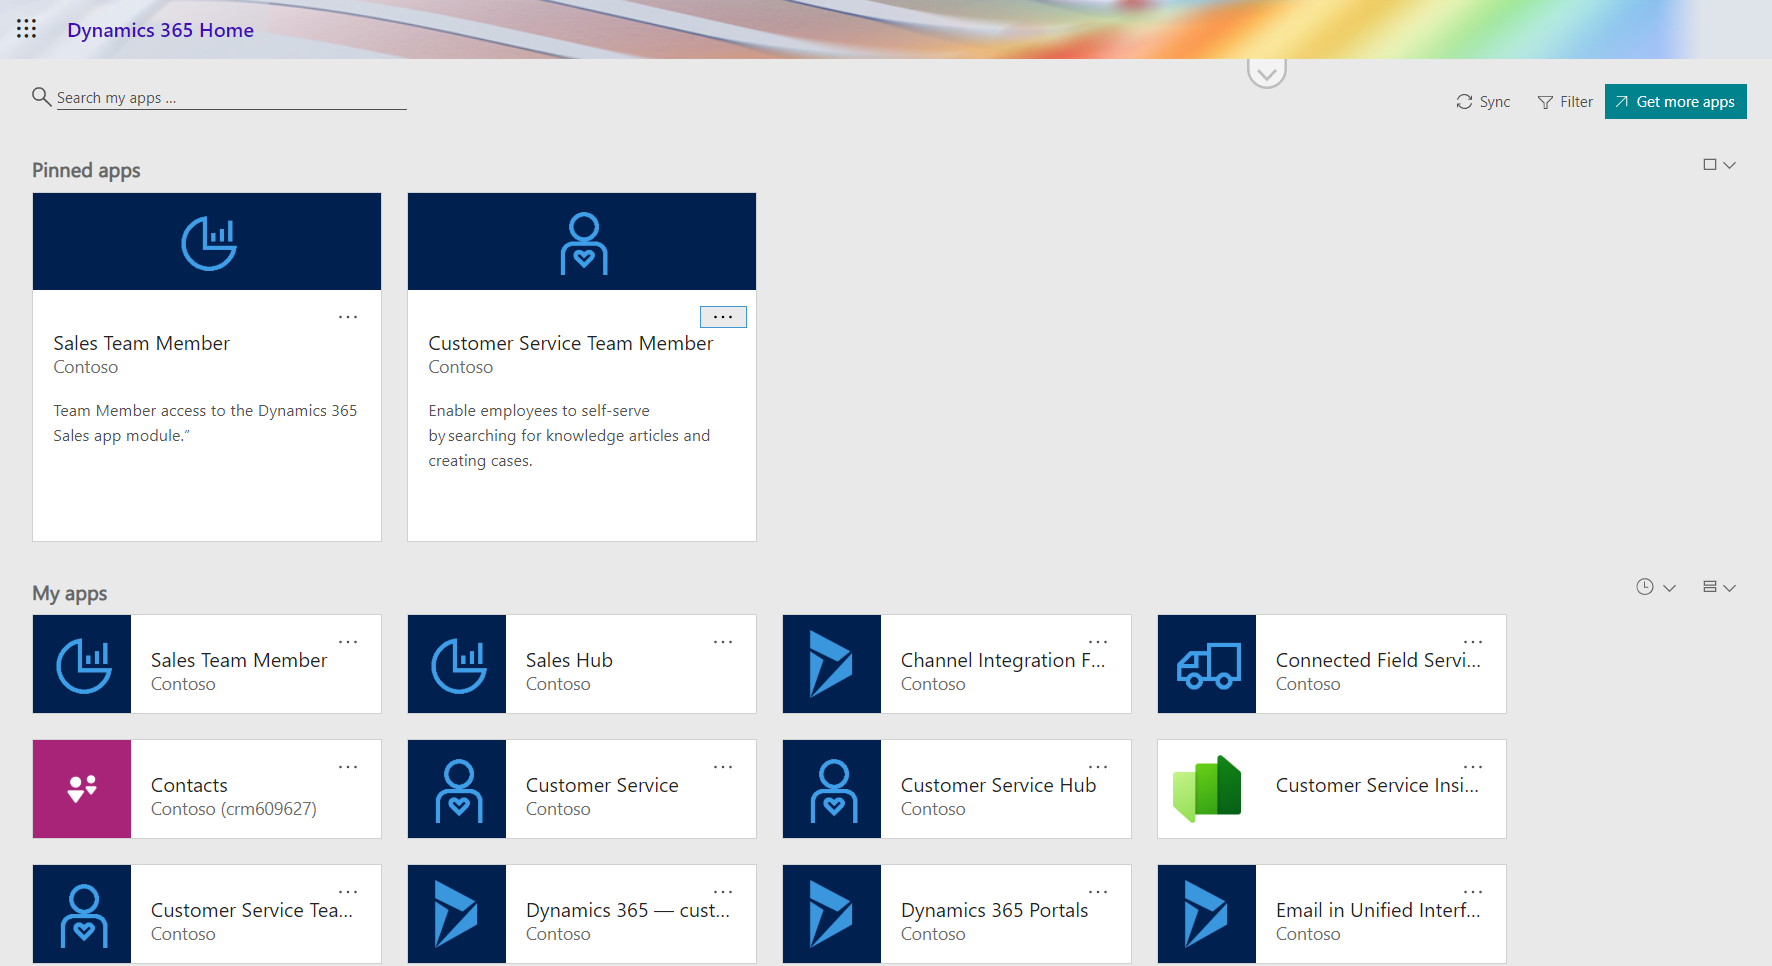
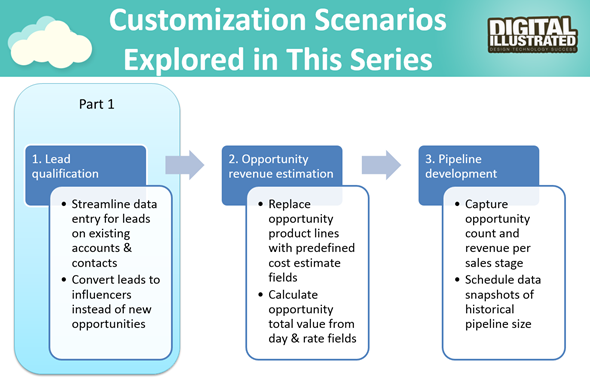
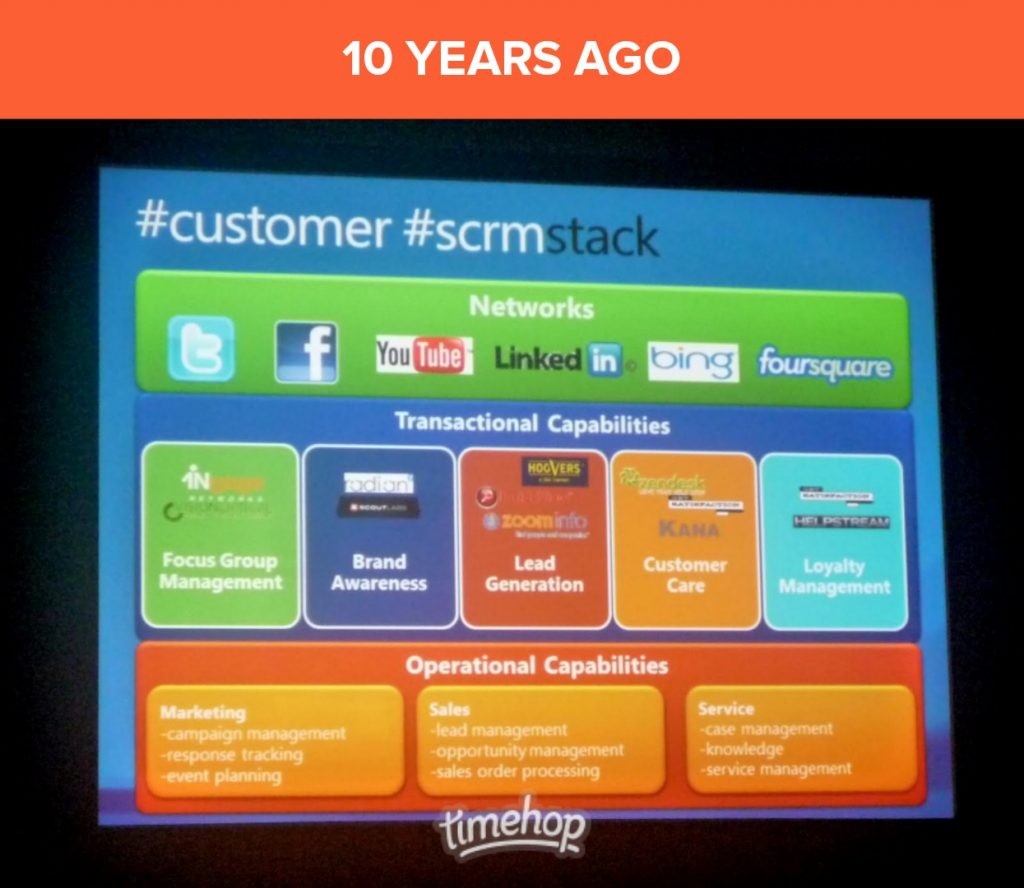
What actually inspired me to start writing this article about Social CRM is the image that I saw in my Timehop stream yesterday morning. For those who don’t know, Timehop is a service that creates a bucket of digital memories from the same date X years ago and delivers it as a push notification on your smartphone every day (I wish the still did the email digest but that’s another rant). 10 years ago I was attending the Microsoft Convergence conference in Atlanta and attending a session called “Deriving Value from Social Networks”, delivered by Nikhil Hasija from MS and Paul Greenberg from… well, you know Paul already. The picture I had grabbed from the session was this #Customer #SCRM Stack slide:
Not just that, I actually wrote a review about the session in my blog that used to be called Surviving CRM. With the whole Social CRM topic fresh in my mind I needed to go and revisit my notes from a decade ago, to gain some perspective on what the world looked like back then and what I was expecting to see from technology vendors like Microsoft on this social front.
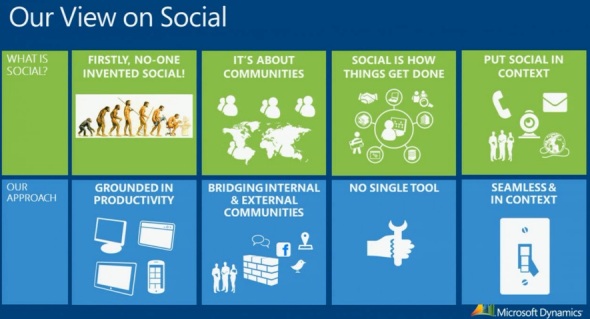
The early 2010s were a time of Social CRM technology acquisition spree. If you want proof, the company that published this infograph on the Social CRM Arms Race between Oracle and Salesforce in June 2012 (which I referenced in my later blog posts) had actually found itself to be part of Salesforce only one year later – after having first been acquired by ExactTarget. Microsoft was late to the game and playing with a considerably lower stack of chips than these two. In hindsight, it may have been wise to not pour in all of their money into this one table, since it’s hard to say if the ROI has truly been there for any of the large tech corporations that were chasing the elusive Social CRM suite at the time. Still, MS naturally had to take part in the game, which is depicted in this 2012 slide on how the Dynamics team perceived the role of Social in their product strategy:
Viewed through the lenses of a MSFT ecosytem player like myself, here are some of my own observations on how their strategy eventually played out in different areas of Social CRM.
Social network data streams
The big data from public social feeds like Twitter and Facebook was at one time considered to be so critical for your SCRM product offering that Microsoft went out and bought a company called Netbreeze in 2013 that had built a system to harvest social posts and produce nice looking analytics on top of it. Initially named as Microsoft Social Listening and then Microsoft Social Engagement (MSE), the service was offered to basically all Dynamics CRM Online customers for free. This unfortunately meant most of them didn’t actually perceived it as a serious business tool, which I’d imagine also affected the product development budget in a negative way, leading to a vicious cycle.
In the beginning of 2019 Microsoft announced it was going to shut down MSE, and at the same time launched a preview of a new service called Dynamics 365 Market Insights. Then a year later also Market Insights was discontinued, with the message that some of the capabilities will find new homes in Dynamics 365 Customer Insights or Microsoft Bing industry updates. One thing to keep in mind is that the actual social data streams of Twitter and Facebook had already been removed from the scope of the product before that, so the statement doesn’t necessarily cover those ever making a return.
After making investments in both acquisitions as well as product development over the past 8 years, Microsoft has now effectively made an exit from the business of social listening and social engagement. Partner solutions from the likes of Sprinklr, Orlo or Hootsuite are now offered as the systems to use for social media management with their integrations to Dynamics 365 apps. Entities like Social Profile and Social Activity remain in the Common Data Model schema, but I’m not sure if there’s any service feeding data into them after MSE is gone.
I don’t believe for a moment that Microsoft would not be seeing value in the data itself, rather I think they are aligning themselves behind a much more realistic strategy now. Building upon the strength of Azure data platfrom, Microsoft’s Customer Data Platform is in a position to make them a leader in CDP rather than a follower in social data processing. This is much better in line with how Satya Nadella has been transforming MS from their early OS monopoly roots into a team player for the cloud, seeking to create value via new connections in the global network of people and technology, rather than trying to (immediately) bring down their competitors.
Social selling
While there is far more data in the social media firehose of Facebook, Instagram, Twitter etc., the one source that everyone in the B2B business of CRM have always had their eyes on is LinkedIn. It is their API that was the foundation of so many early Social CRM tools like Nimble back in the 2010 era. LinkedIn’s decision to lock out these smaller CRM providers in their 2014 “LinkedOut” API restrictions put an end to the era where building a sales app of your own on top of a database from someone else had seemed like a good idea.
Undoubtedly the biggest move that Microsoft has ever made in the social field was the 2016 acuisition of LinkedIn for $26 billion (note that this was already during the Nadella reign). As this deal was reportedly a competition between Salesforce and MS, it was only natural that the initial assumptions were for this new data source to light up in the Dynamics products and change the game of B2B CRM forever.
It hasn’t happened yet. What we’ve seen so far on the Dynamics 365 side has been mostly just the Microsoft Relationship Sales offering that embeds content from LinkedIn into the UI of Dynamics. Sure, there’s a bit more to it on the functional side, but it still closelt resembles the LinkedIn Sales Navigator that Paul Greenberg has always hated, calling it “a faux middleware to get access to the LinkedIn data”. In the standard Dynamics 365 Sales Enterprise app, there still isn’t even a LinkedIn profile card available yet for contacts, whereas Outlook on the web shows one. All in all we’re still surprisingly close to what the social selling story for Dynamics CRM was back in 2013.
Instead of using LinkedIn as a weapon in the battle for CRM supremacy, Microsoft appears to have chosen to play the long game – and also to play it safe. I belive the major driver behind this approach has been the hightened attention on privacy. Back in 2010, there wasn’t a widespread awareness yet on the potential privacy issues that the global social networks have introduced into our lives. Today pretty much everyone has heard what the NSA had been doing with their social data archives, as well as how Cambridge Analytica gamed the election systems with the help of Facebook social profile/network data and ad targeting. We’ve seen GDPR come into effect in the EU, forcing companies from around the world to pay attention to their policies and procedures around customer data handling.
The real strategic value from LinkedIn isn’t in the straightforward enablement of social selling via offering data to users of a CRM system, rather it is in the “professional graph” that Microsoft can build when combining this with signals from its own services like Office 365. Yes, in the end it will help both Microsoft and its customers to sell more products and services in the digital world, of course. It’s just going to be more AI driven than the original visions from a decade ago, with MS keeping the network data closer to itself and the faceless algorithms that are crunching the big data to deliver smart recommendations to the app users.
Social customer service
As mentioned, acquisitions were a popular path for CRM giants to build up capabilities to match the new social customer era in the early 2010s. Customer service was an area where Microsoft originally attempted to bring the self-service capabilities of online knowledge bases and Facebook page embeds into their CRM suite by acquiring a company called Parature. We hardly even saw that product in the European market before it was discontinued, in favor of a long & winding internal feature development path to build a foundation on top of which the customer organizations could build their service processes (often still requiring plenty of custom code). While SaaS products like Zendesk weren’t necessarily customizable enough for enterprise needs, what they did was show a level of modern customer service experiences that seemed very difficult to reach when building up from a traditional CRM system design to be used behind corporate firewalls.
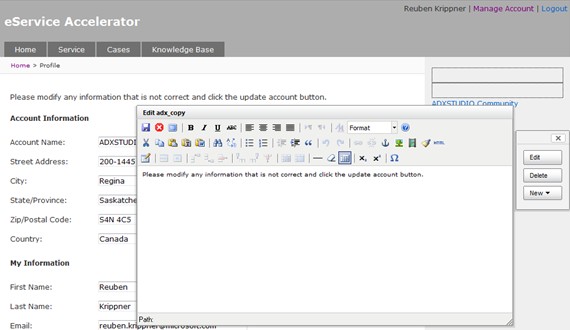
That’s ultimately what was always weighing down a product like MS CRM in the Social CRM race: it was designed to be an internal system. Exposing the data to the outside world meant that you had to re-think the system architecture in a major way. Sure, there were visionaries already back in Convergence 2010 like Adxstudio that powered the portal accelerators for CRM Online. Later MS decided to acquire the company and today that technology also powers the Power Apps Portals aimed at citizen developers, to quickly build self-service interfaces to access line of business data via responsive web interfaces.
Omnichannel has been a big investment area for Dynamics 365 in the past few years. While still working on their own web chat, co-browsing and call/video technology for the public web, Microsoft partnered with CafeX to offer a stop-gap solution to allow live online support experiences on their Portals. The recent updates to Omnichannel are now finally bringing also non-MS channels into play, with support for WhatsApp discussions (via Twilio), Twitter, WeChat and LINE. The modern Azure-based architecture of Microsoft Teams provides a solid foundation for future expansion of messaging functionality. You could say that after a slow start and a few side steps, the social customer service story has developed into a promising direction.
Social events
The backchannel of physical events that takes place in social media, under specific hashtags, was a big new phenomenon back in 2010. It was around that time when I started to actively follow and curate content from conferences around the world, from the comfort of my own home, armed with just a set of Twitter streams on my Tweetdeck client. Actual live streams of the sessions were still very rare, but the community around MS Business Applications strated to come together precisely because of the key role of individuals in spreading the word on what was being presented on the live stage.
As it just happens, 2010 was the year of the ash cloud, which stopped a significant slice of all air traffic globally and forced conference attendees like me to look for alternative routes to get to the venue from the other side of the globe:
Looking back at what a single volcano did in 2010, it was a tiny little blip compared to the COVID19 pandemic we are facing right now. In trying to adjust to the new reality of a world full of coronavirus, Microsoft has announced to go digital-only with its own events for at least the end of June 2021. While I belive this is the right move for them to make, I also belive Microsoft will take this as an opportunity to build up their own technical capabilities for running virtual events and offering social engagement channels around them. This would surely be a very welcome direction for Microsoft’s customers, since these capabilities haven’t progressed as much from the year 2010 as you could have expected. Let’s look at a few key elements that could use bigger investments:
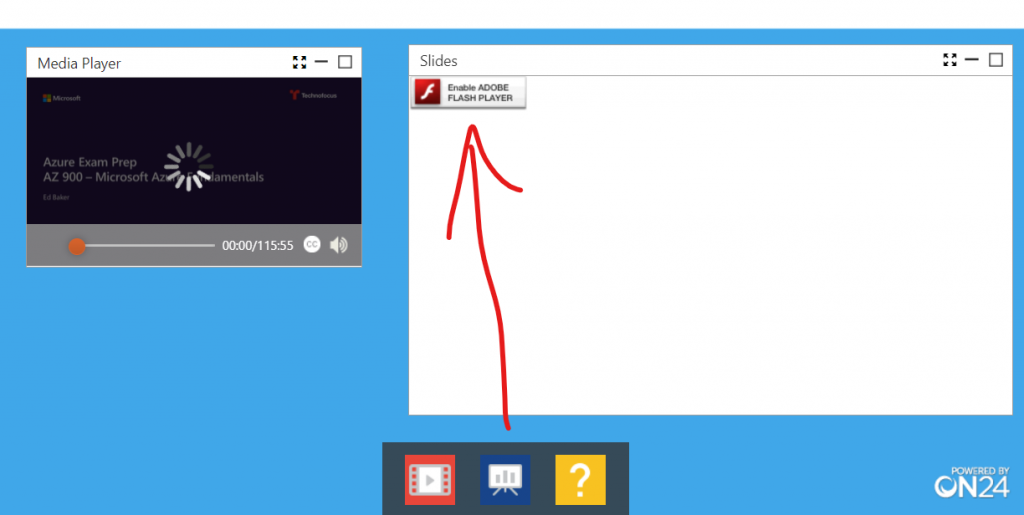
Webinars. Those who participate in the MS partner ecosystem events may well have run into the ON24 webinar platform. It also happens to be the only supported webinar provider for Dynamics 365 Marketing today. To give you an example of the event attendee experience for ON24, let’s just say that the little red icon you see in the Slides window below belongs back to 2010, not this current decade that the rest of us are living in…
Event recordings. Microsoft does run a service called Stream that’s included in Office 365 (Microsoft 365) subscriptions, but it doesn’t allow sharing videos with anyone outside of your tenant. Not even guest accounts that can sign into the Microsoft Teams teams are allowed to view event recordings from Stream. Since this limitation has been around for over two years already, I suspect we’re not very close yet on Stream becoming a real competitor for the public video sharing services like YouTube or Vimeo and their community features.
Slides. Together with their LinkedIn acquistion, Microsoft became the owner of SlideShare. While initially it would seem like an obvious “better together” story to have the makers of PowerPoint united with the leading social platform for sharing slides, this has obviously not been an area that MS has prioritized. In fact, the SlideShare service seems to have been abandoned years ago already. Instead of developing new features, even old useful ones are now being stripped away. You can no longer sign up for a company account, as this option has been silently removed, so our new company had to give up on the idea of distributing our webinar slides on a MS hosted service and instead just publish them as PDFs on our WordPress site.
Social apps ecosystem
The Social CRM movement was all about putting the customer in control of the conversation with the company, thus leading to an inevitable growth in the number of different services and digital touchpoints where the interaction would take place. Therefore it was no longer possible for companies to build a “one perfect system” to govern all the relevant processes and messages, rather the CRM systems had to become more compatibile with the outside world and the various services where the conversation took place. In practice you needed to support an ecosystem of apps and service providers to partner with one another and to offer connectors between the data sources and targets.
The technical infrastructure in 2010 wasn’t ready for this at all yet. Back in Convergence 2010 it was the first major event where the upcoming solution framework in Dynamics CRM 2011 was being presented. This mechanism was going to allow apps from different providers to be plugged on top of the common platform (and also unplugged) without the work traditionally required from a systems integrator that managed the CRM system. The CRM Online service launched globally on the following year would also heavily depend on this new modular model of extending the CRM capabilities with integrations to new cloud services without disrupting the core business processes that were relying on this system of record.
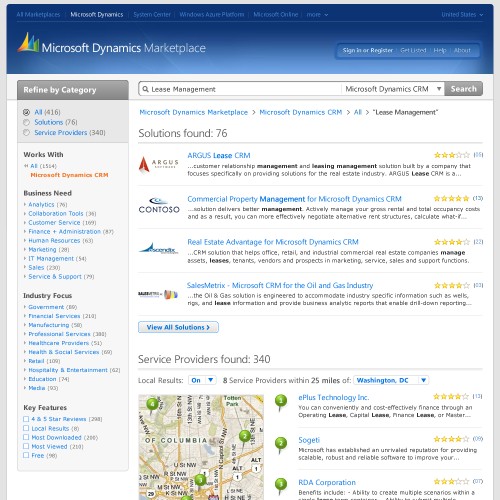
In 2010 the Apple App Store had already been around for a couple of years and this model was envisioned to become the new standard for also how business software capabilities were distributed in the near future. Out of all pieces in the puzzle for Social CRM technology, the inability to build a viable marketplace for ISVs from also outside the immediate MS ecosystem was perhaps the biggeset stumbling block for Microsoft. What was launched as Dynamics Marketplace in 2010 became pretty much all that there would ever be: a random listing of solutions and service providers that did very little to help customers in discovering the right building blocks for the latest social technologies and services for their CRM systems.
This part of the journey has been incredibly long, but on the technical side of things we’re still moving along. The solution framework that was being previewed for XRM in 2010 is being developed to support the whole range of new Power Platform services in 2020 that now share the same foundation. It’s pretty wild that the low-code tools being offered to citizen developers across all corners of organizations are now riding along in the same freight train that originally consisted of only the sales, marketing and services cars of CRM.
This is representative of a larger movement that I think has also changed how CRM and social channels are coming together these days. Moving most of the core CRM systems into the cloud for modern organizations has made them far more accessible to social data, even without tightly coupled integrations via packaged apps. Technologies like Azure Logic Apps and Power Automate (Flow) have lowered the barrier for connecting systems together and thus made the sales, marketing and service departments a lot more agile in adopting and integrating with new social tools. In a way, the need for an SCRM suite to be built by a big tech corporation has somewhat diminished as a result of this, because customer organizations are now better equipped in assembling their own unique toolkits for engaging in social channels while connecting to their systems of record.
“One more thing”
Ah, nothing takes you back in time to the days of early Social CRM like that iconic phrase from a certain tech company’s keynotes… Anyway, to close off this exploration into the days gone by, here’s one more gem that Timehop delivered to me from 10 years ago:
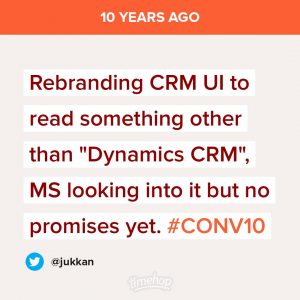
For once I can say “I told you so”! Now, this particular tweet was surely about providing the customers to the option to change the visual branding of their system, but in retrospect it almost looks like if Microsoft themselves wanted to break free from the cages of the CRM acronym already way back then. Splitting the Dynamics 365 suite into separate apps and stopping the use of the term CRM was a controversial move back in 2016, which appears to have only accelerated the juggling of product brand names at MS in the past few years.
The convenience of having an established acronym to describe what you’re doing is definitely very tempting for us lazy human beings, and attaching terms like “Social” into it must seem like the easiest way to explain something new while still holding on to all the old stuff. In the end, though, Social CRM became the everyday reality through routes we might not have expected to travel – and we stopped calling it both “Social” and – on the technical platform side – “CRM”. Or did we?