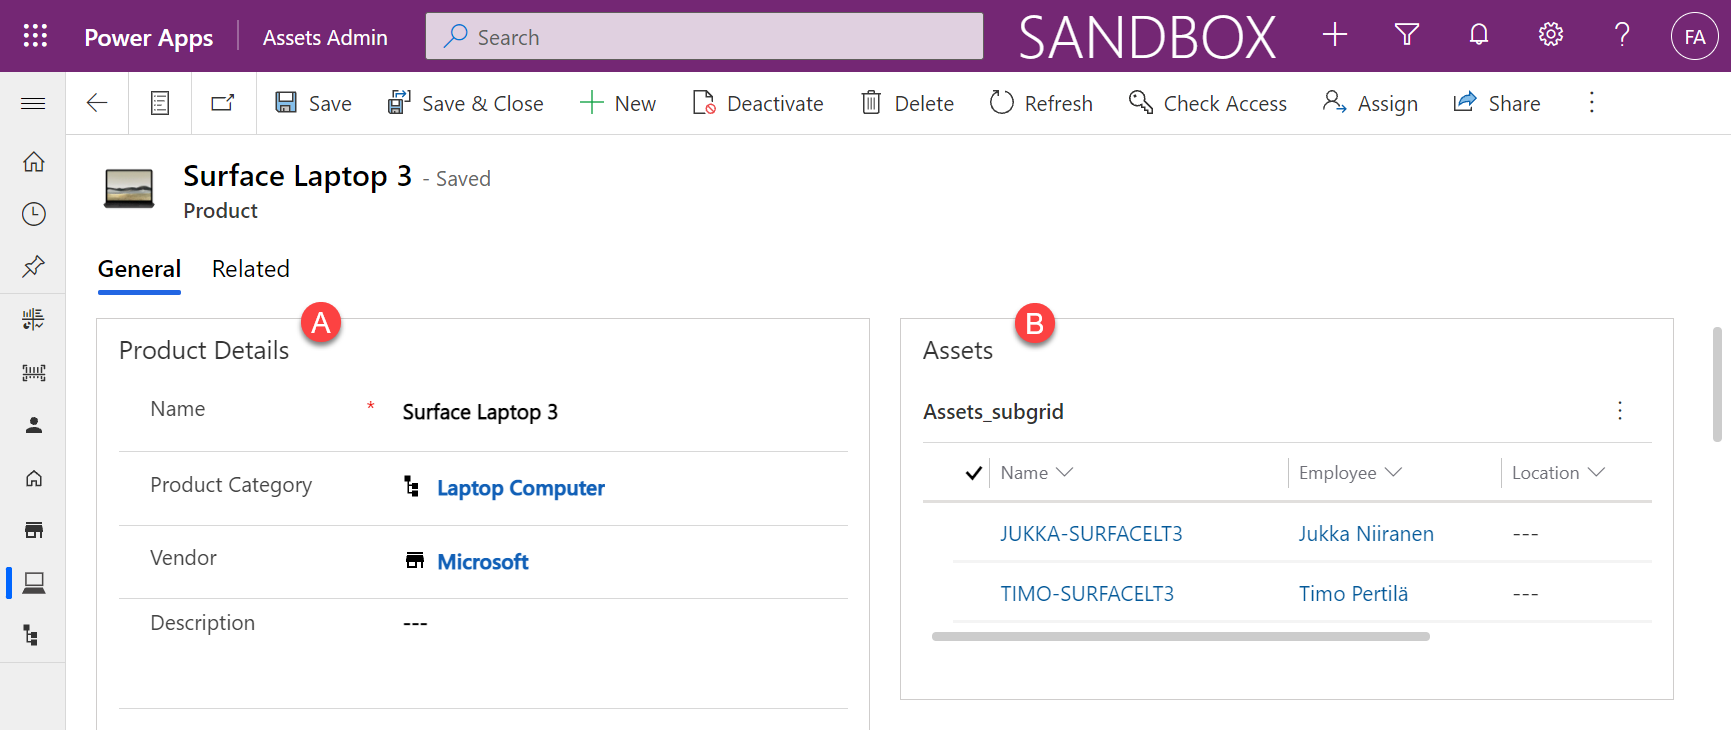
So far in my experiments with Power Fx and the modern commanding preview in Model-driven Power Apps, I’ve worked with changing record status and cloning a set of existing records. This time I’ll create a custom button for another common CRM scenario: viewing the contact’s LinkedIn profile information.
In our internal CRM application (Business Forward app) I’ve earlier added a custom field “LinkedIn URL” for contact records, which can be used for storing the reference to the contact’s profile. Not all contacts will of course have this field filled, which is why it’s a common need to go and search for the information on linkedin.com. Could we save a few clicks in this manual process with a simple button? We certainly can!
This scenario is straightforward enough that you could well use it as your first custom command bar button in your Model-driven Power App or Dynamics 365 CE app.
Button 1: LinkedIn Search
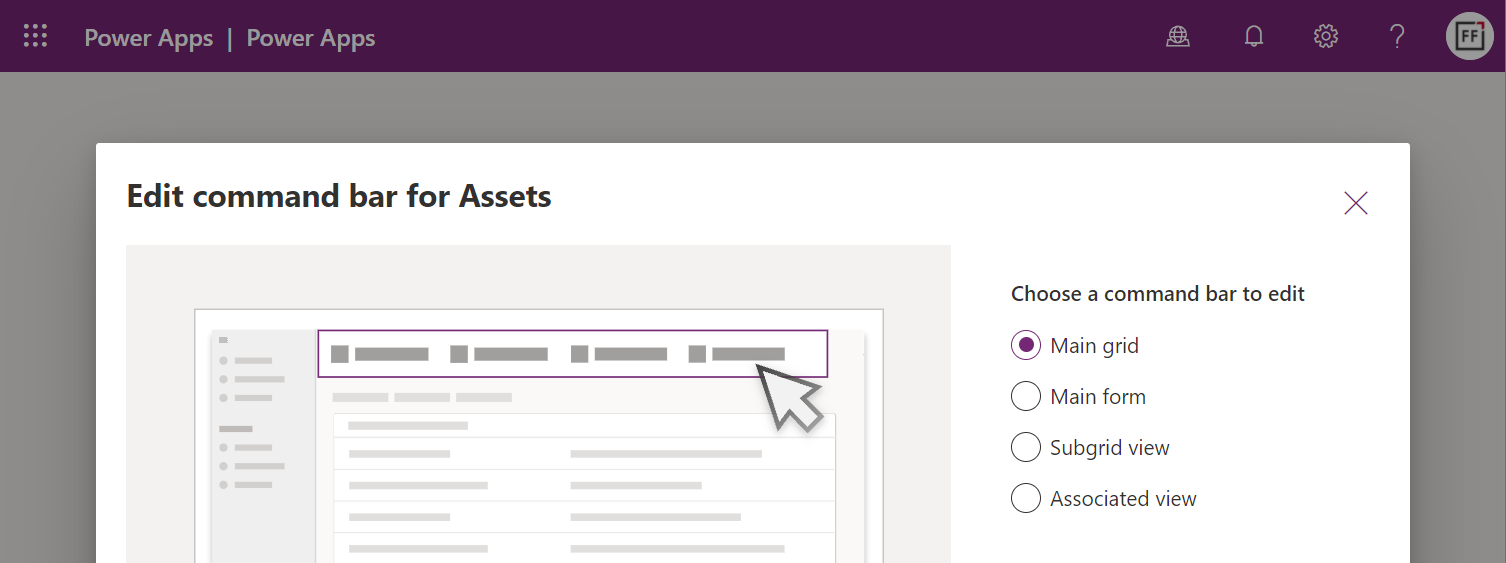
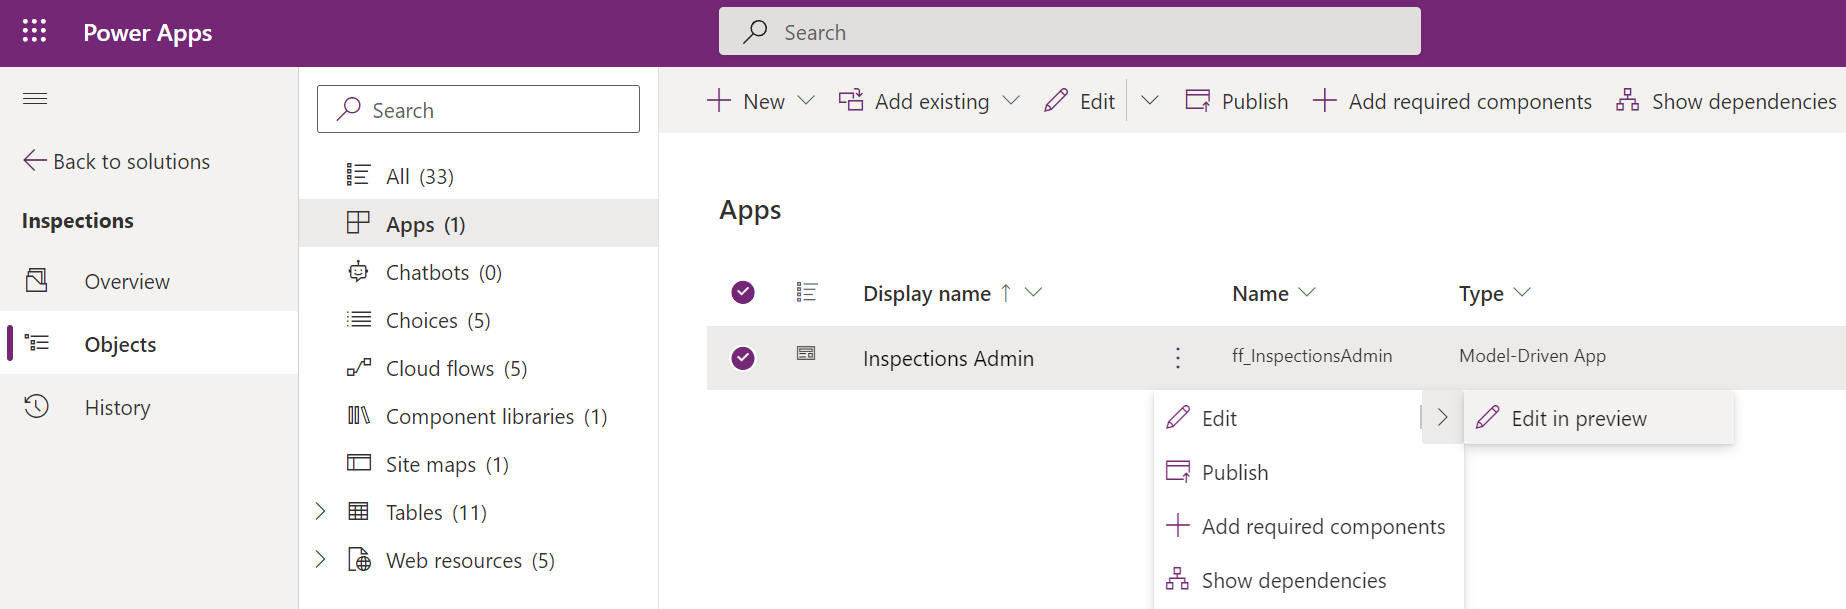
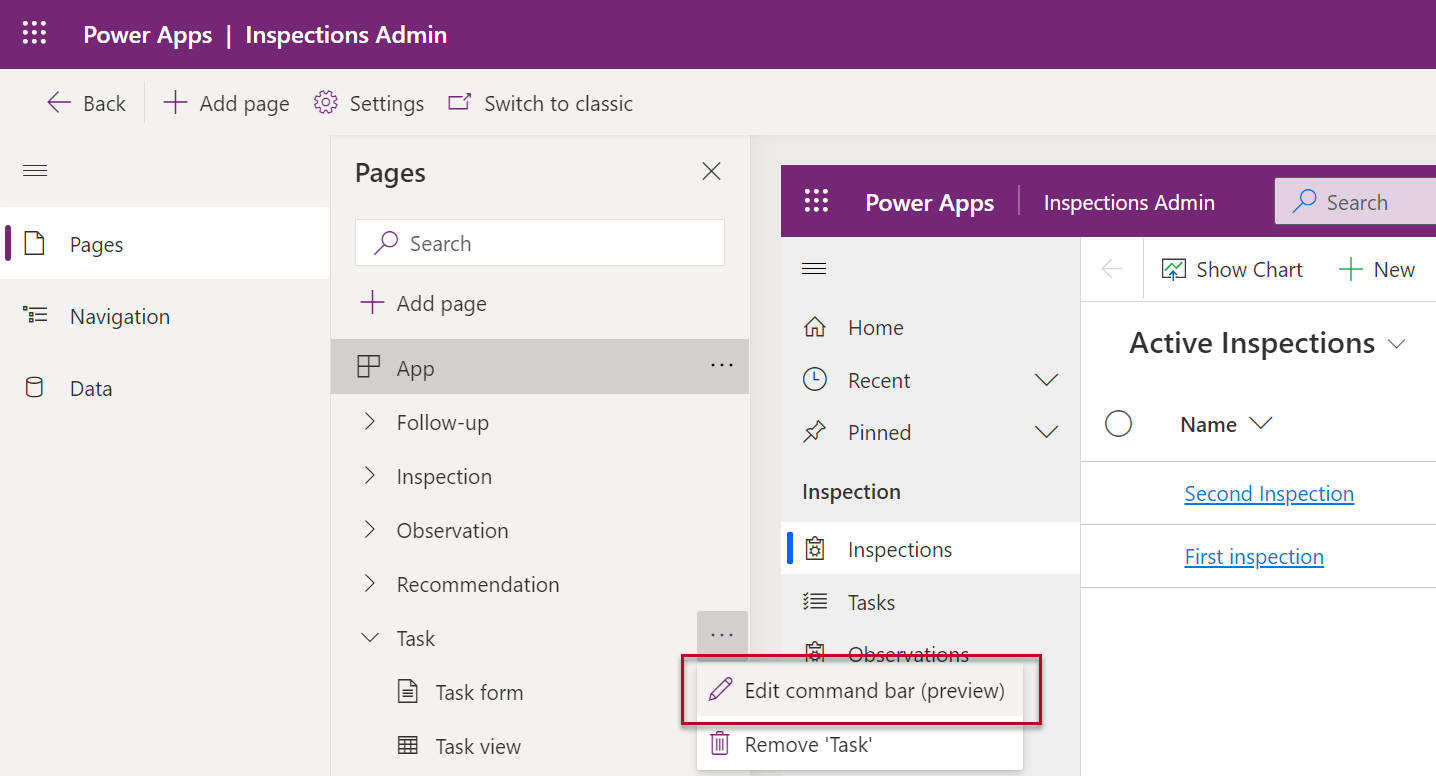
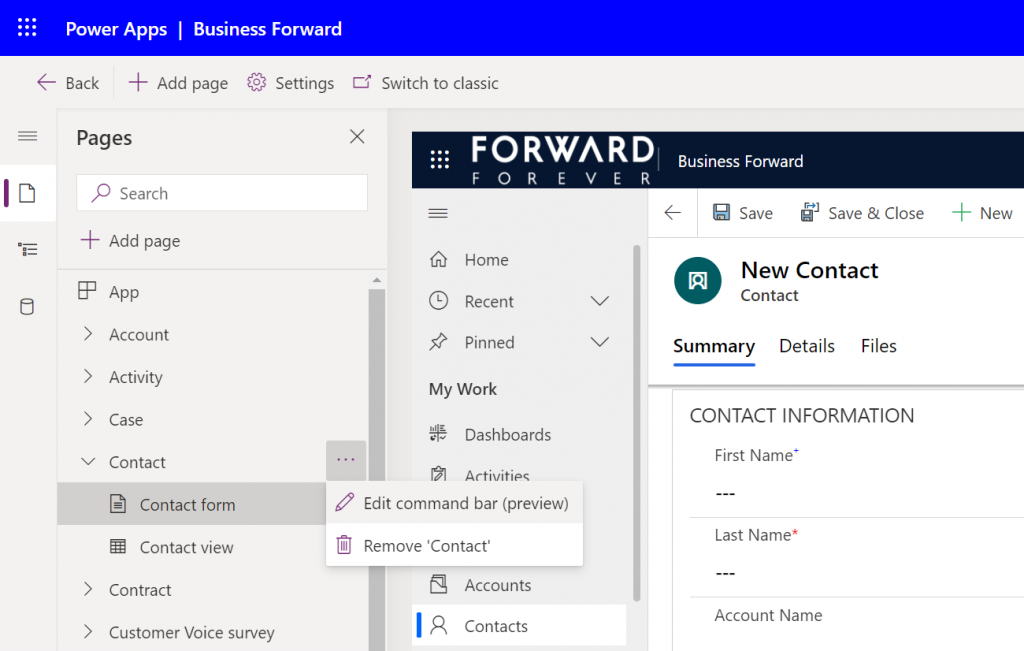
Open up your Model-driven app in the preview editor that allows you to access the list of pages in the app. Then for the contact page select the three dots and click “edit command bar (preview)”:
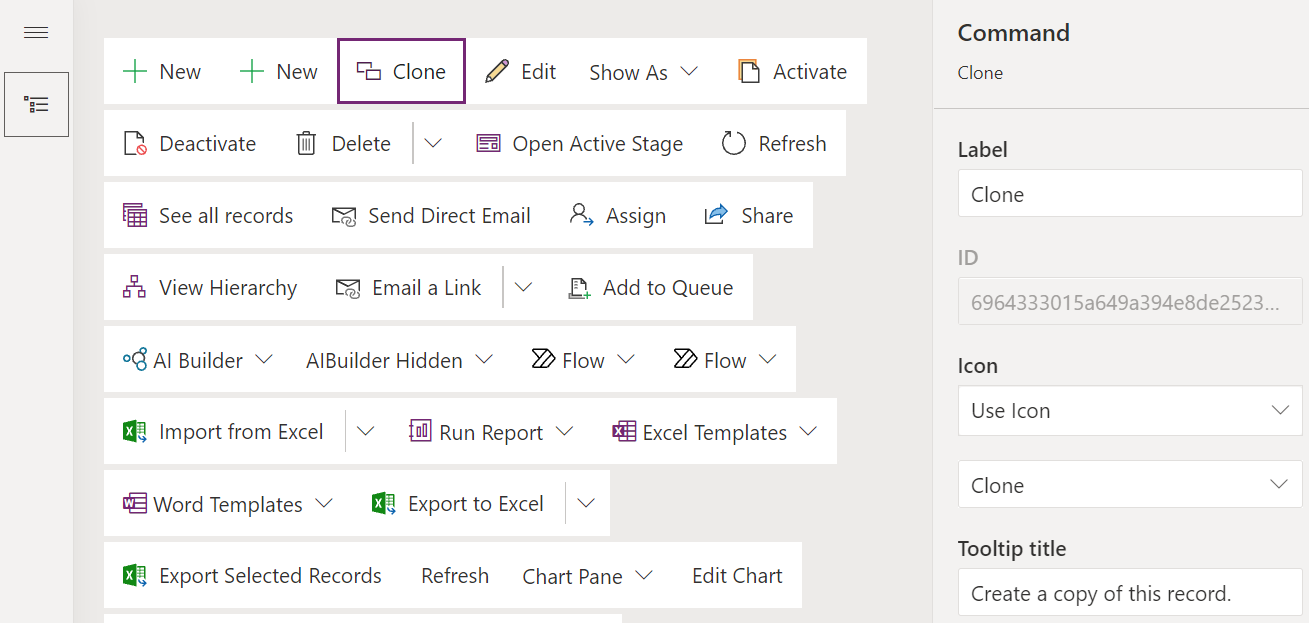
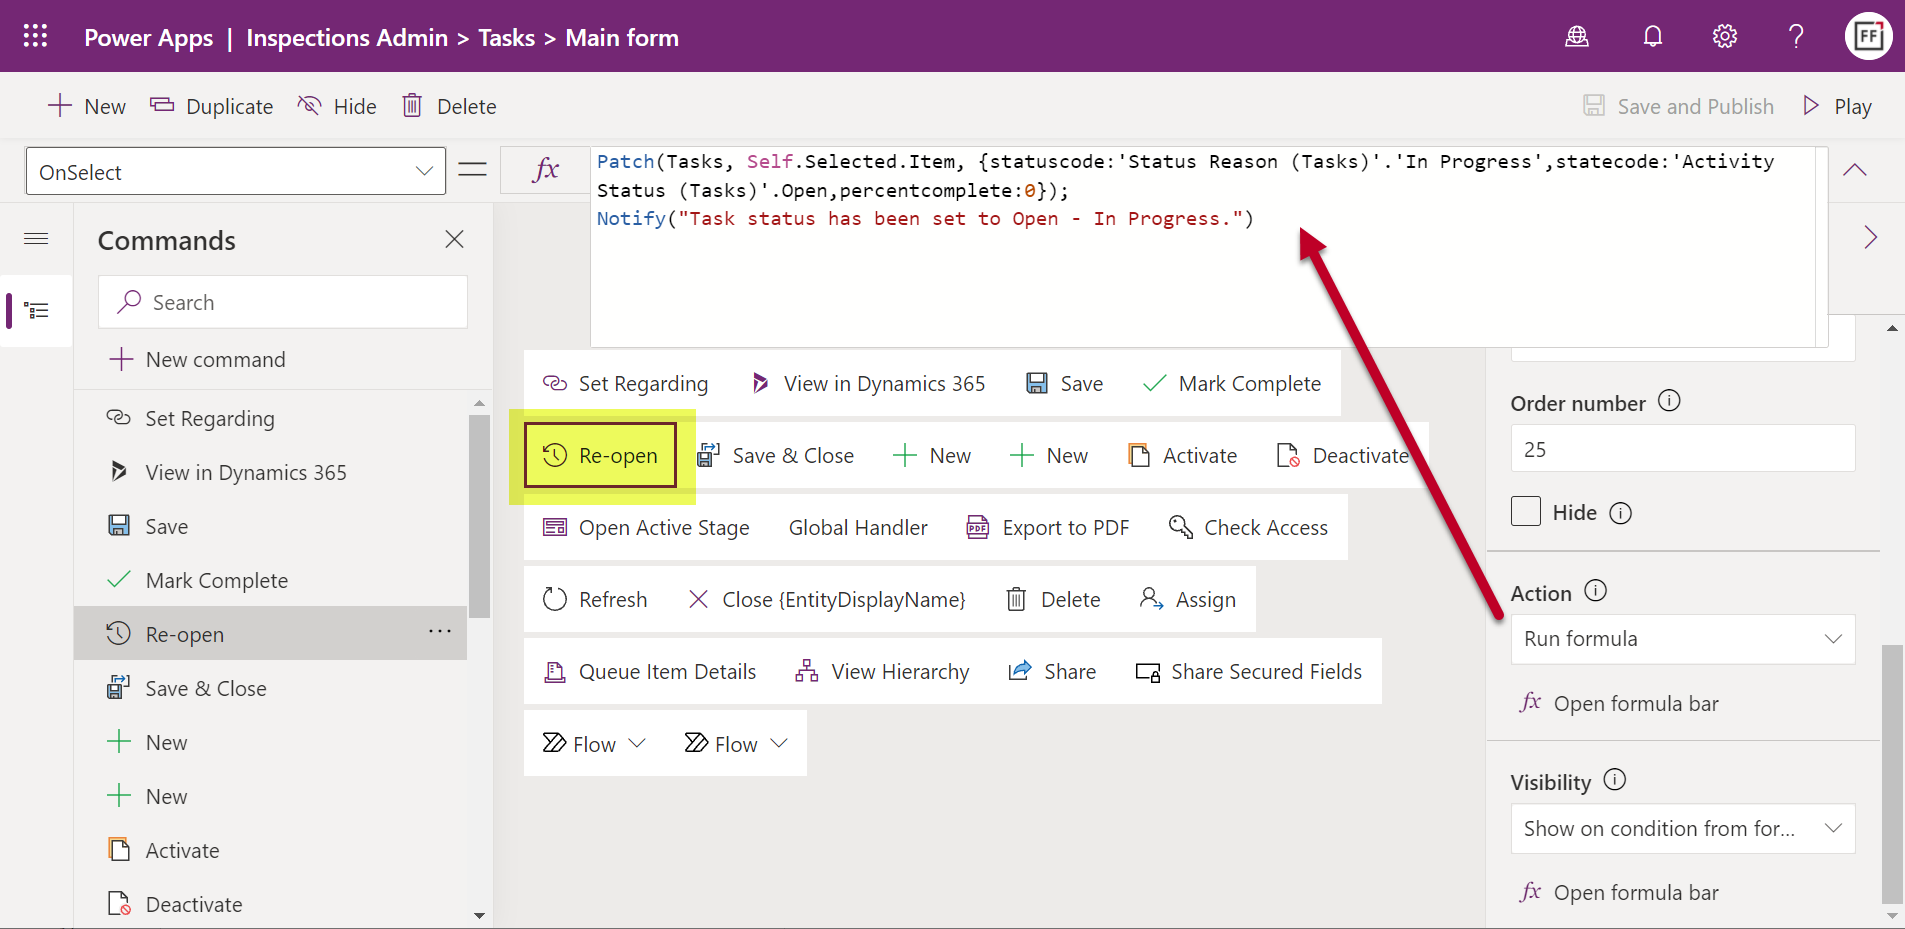
Select the contact’s main form as the target and the command designer will open. Pick a suitable spot in the existing list of commands and add a new button called “LinkedIn Search”. You can choose the out-of-the-box “LinkedInLogo” icon for it.
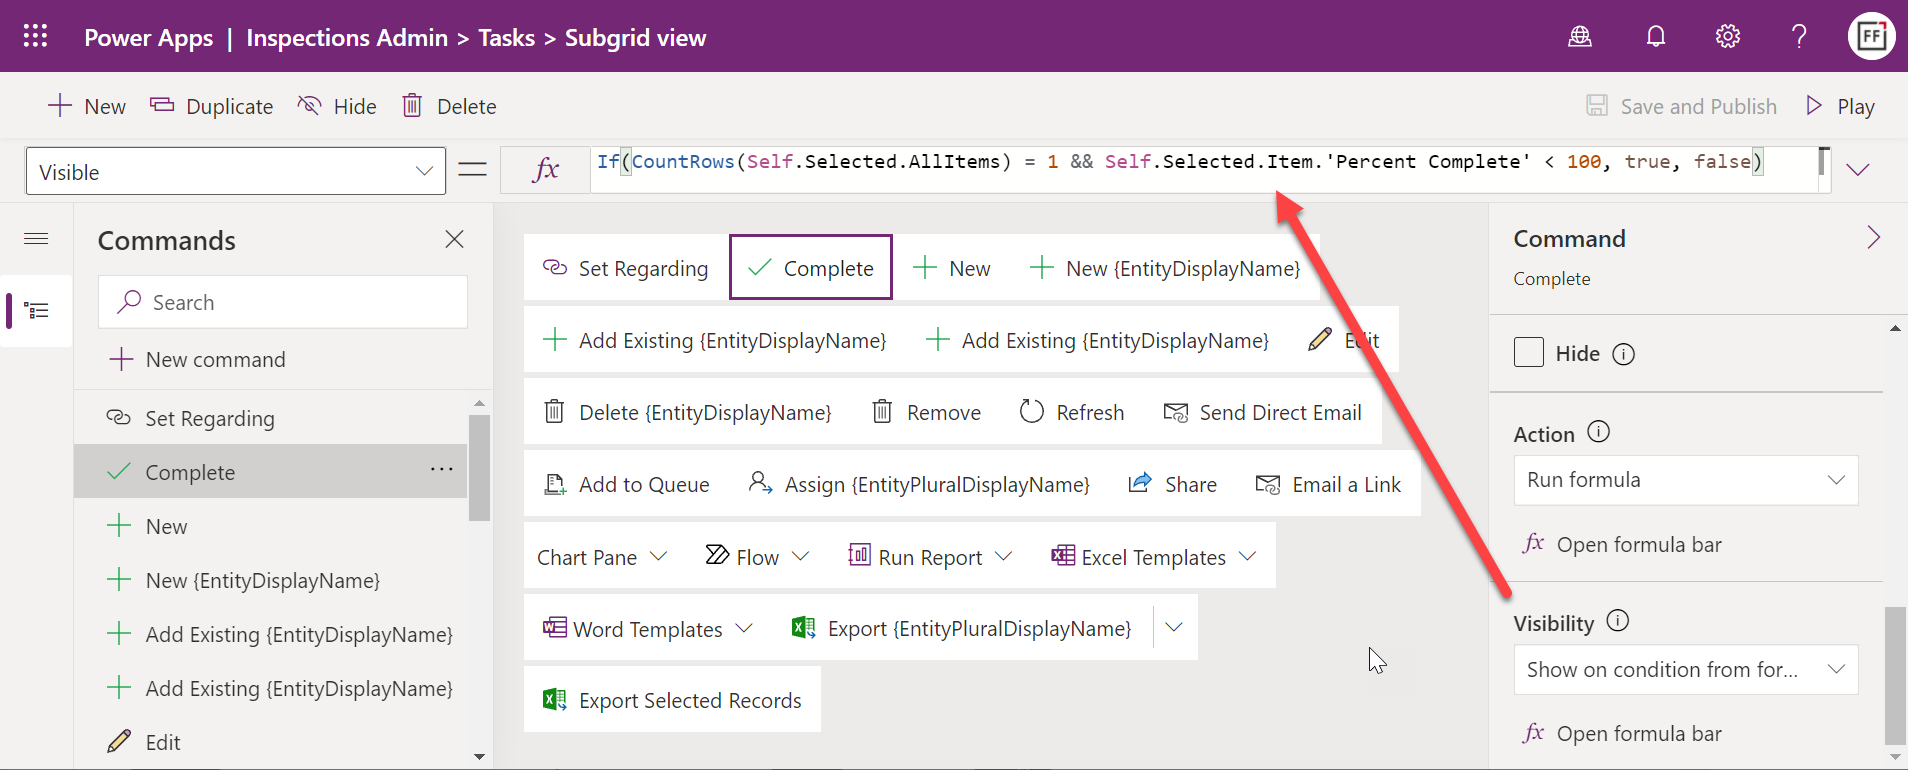
We will want to have a visibility rule that will conditionally show/hide the button, based on whether the contact’s custom text field “LinkedIn URL” contains data or not. The IsBlank function will return a true value when the field is empty, so we can directly input that into the Visible property of our button:
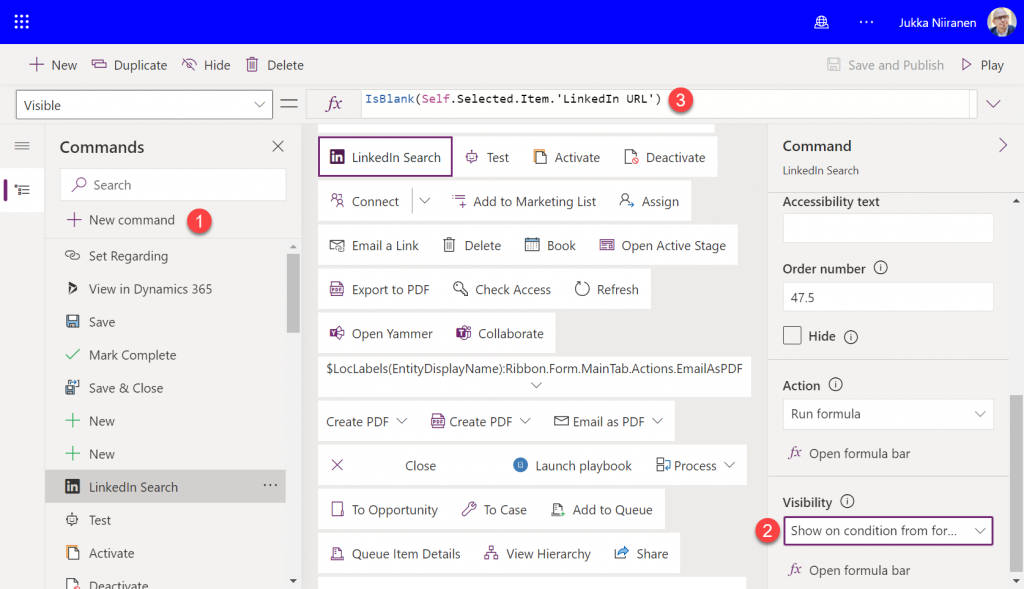
IsBlank(Self.Selected.Item.'LinkedIn URL')Next, let’s go over to LinkedIn website and study how their search actually works. There is of course the global search box in the top navigation bar, but when looking at the search results page we discover additional options for applying specific filters.
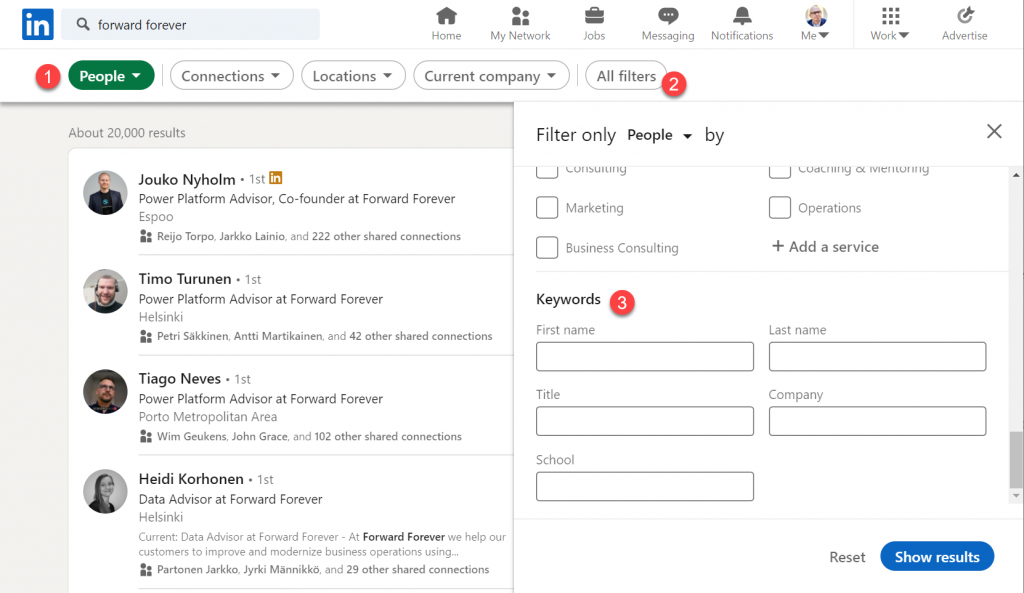
This is the faceted search page, which allows us to specify that we are interested in finding people (1) rather than companies or content. Clicking on “all filters” (2) reveals an even more granular search experience, allowing us to enter keywords (3) for fields like “first name” and “last name”.
If we were to search for Satya Nadella as an example, the result page URL would turn into this:
https://www.linkedin.com/search/results/people/?firstName=satya&lastName=nadellaThis is a great scenario for using Power Fx to manipulate a text string for our app’s purposes and inject some dynamic values in there. We can now start designing our OnSelect formula needed for our LinkedIn Search button. It should do these things:
- Open the LinkedIn search page in a new browser tab
- Insert the contact’s name information into firstName and lastName query parameters
- Ensure that any spaces in the name fields don’t mess up our URL validity
The Launch function will take care of opening the browser tab. For joining the static and dynamic parts of the URL together, we use the string concatenation operator “&”. As for handling any non-URL friendly characters, we can use the EncodeURL function and pass the contact’s first & last name fields to it.
Let’s save and publish these button configurations, which will generate a component library called “OurAppName_DefaultCommandLibrary” into our solution. Be sure to publish all customizations for your solution and also hit refresh a few times on the Power Apps application screen to make things come alive. (Note: you may also get an error the first time you click a custom command bar button, at least for me that happens every time, but then clears away.)
Now when we open a contact record that doesn’t have a value in the “LinkedIn URL” field, the new button should be visible. Clicking on it will open up the LinkedIn people search page with results where the first & last name match the contact’s information:
That was pretty easy!
Button 2: LinkedIn Profile
It would be nice if the next user of our CRM system wouldn’t have to browser through the people search results page to repeat the same query. Unfortunately there’s nothing we could grab with Power Fx from the first user’s new browser tab automatically, so we’ll need to ask the user to copy the URL and past it into our contact’s custom field.
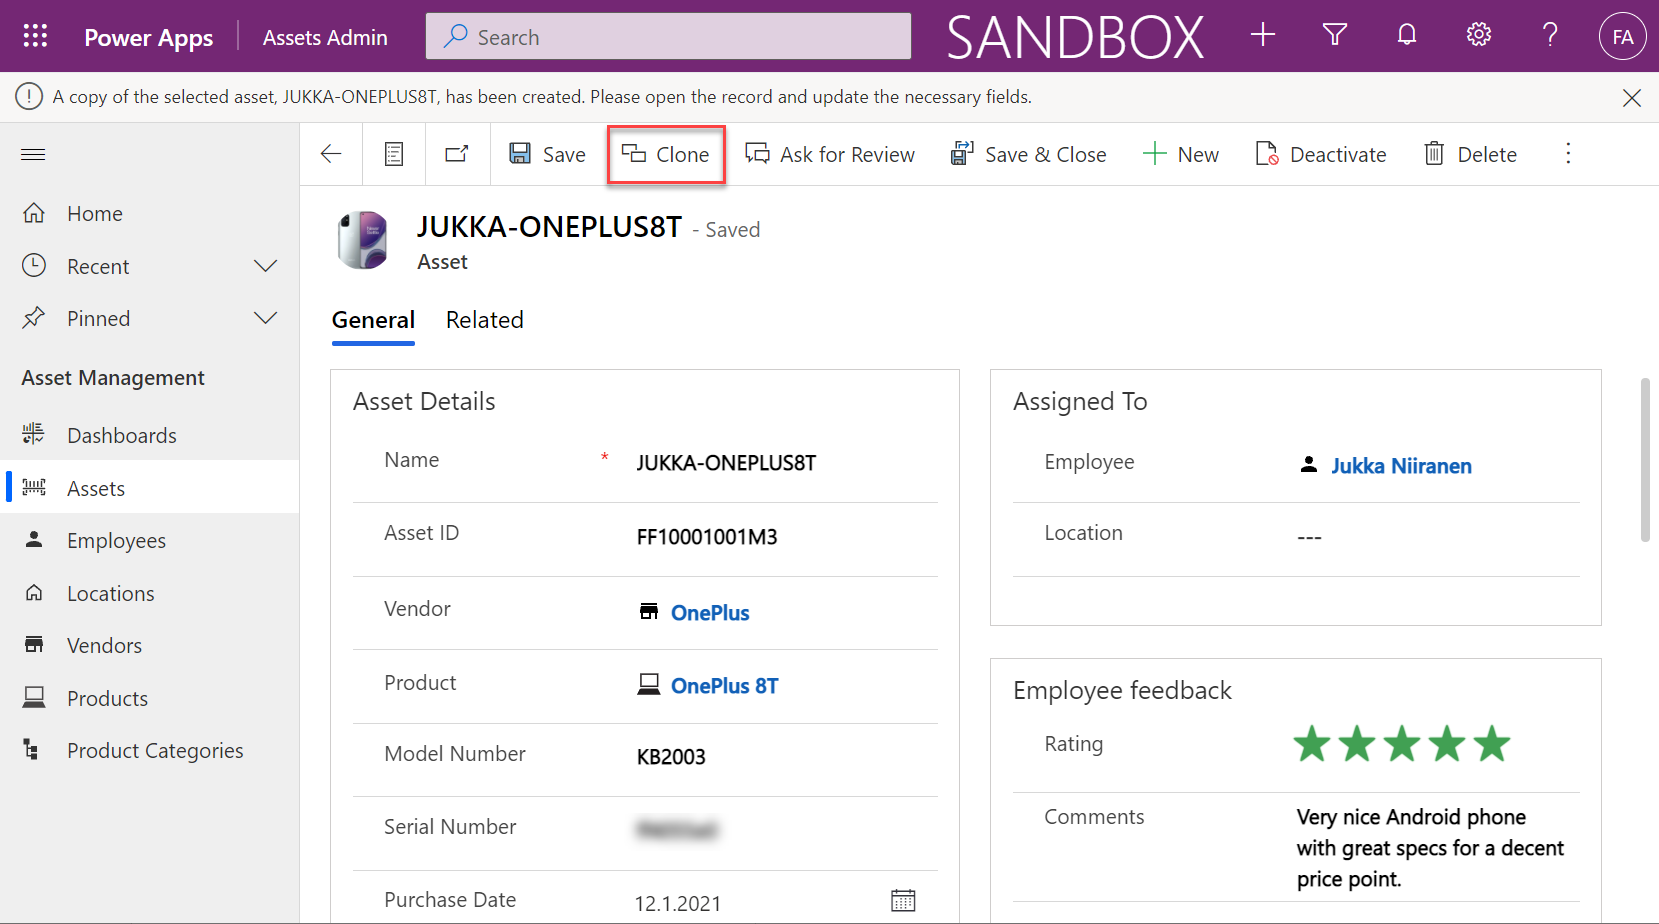
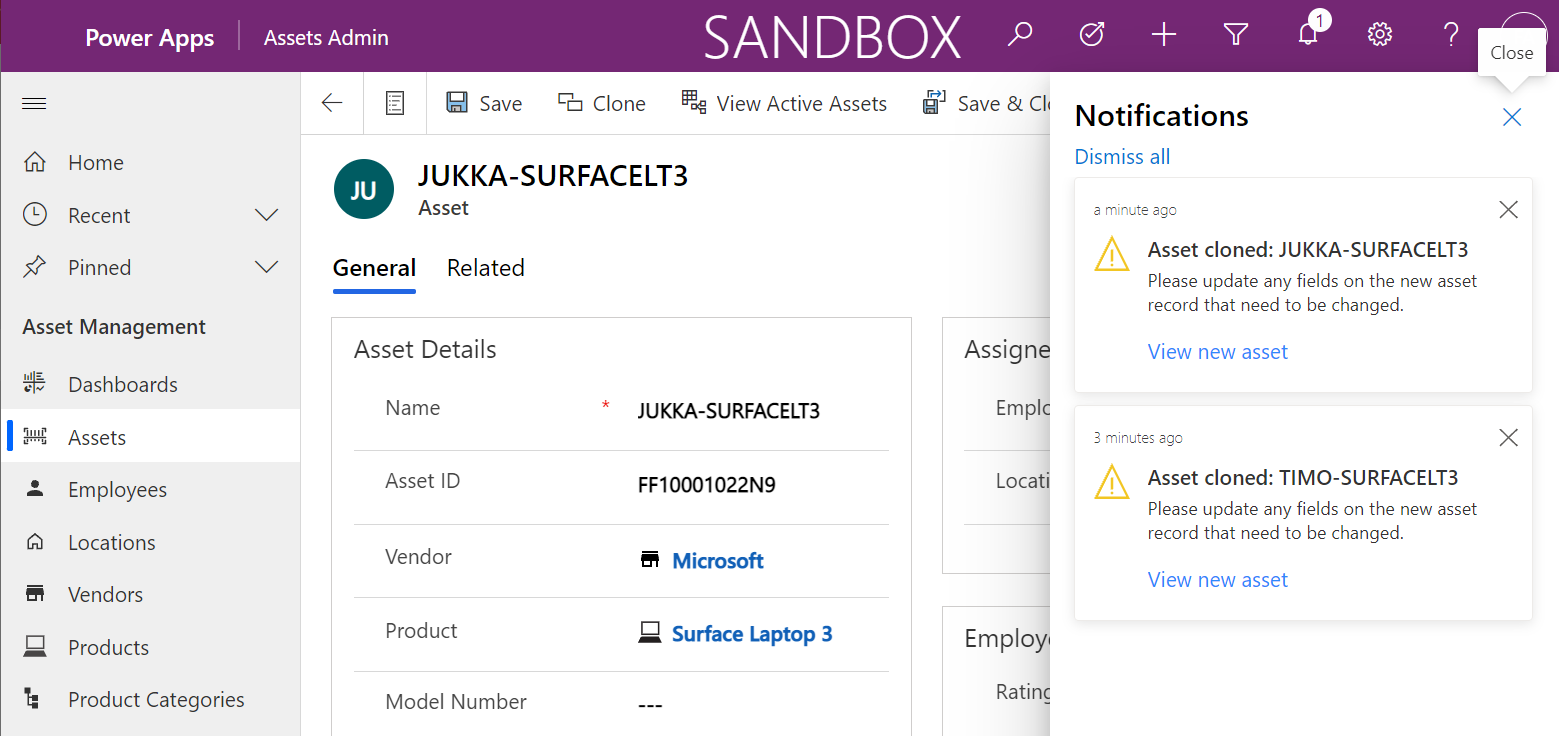
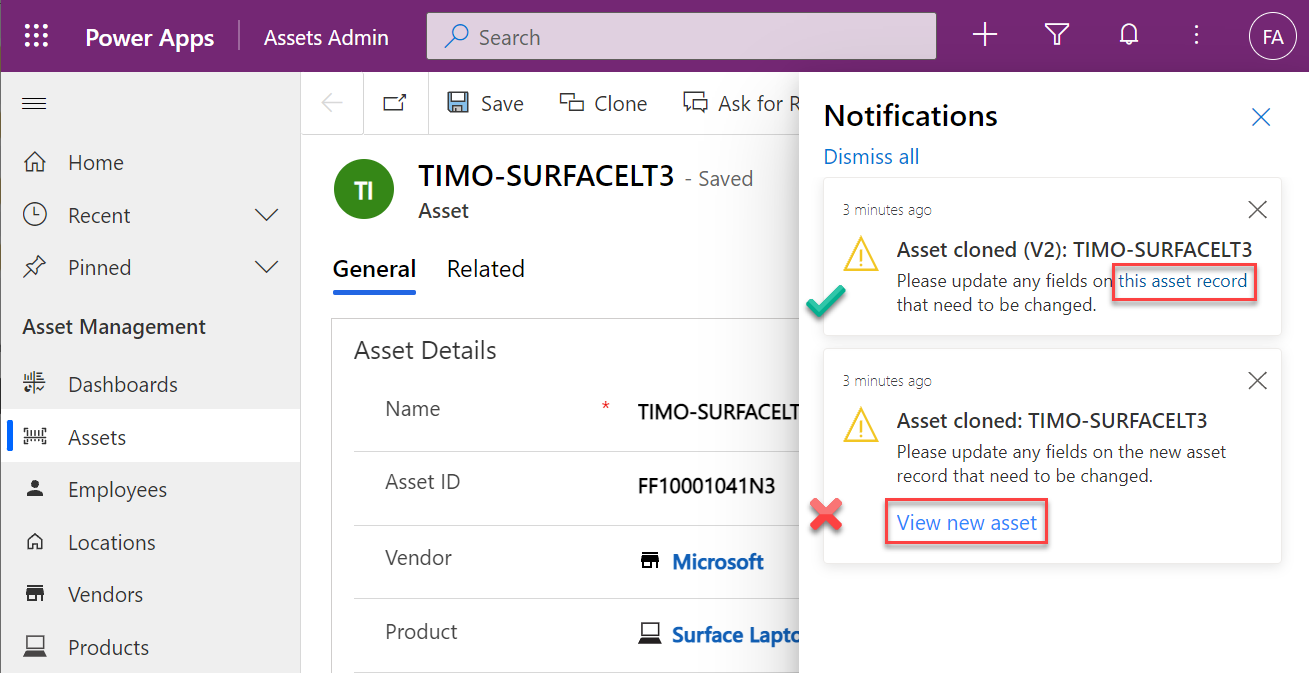
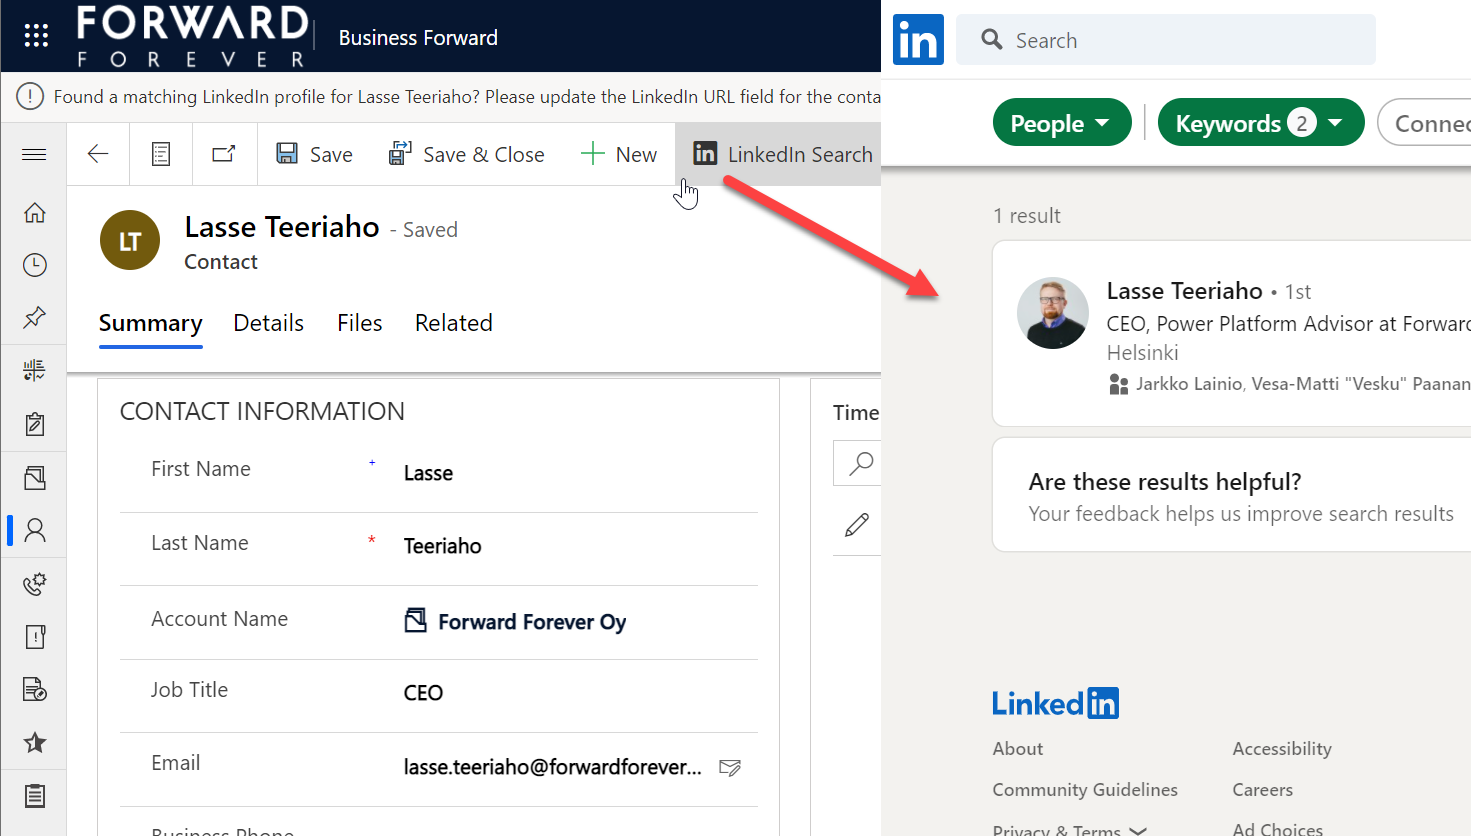
To remind them about the importance of updating CRM contact data, let’s show a notification bar that’s waiting for the user once they return back to the Power Apps tab:
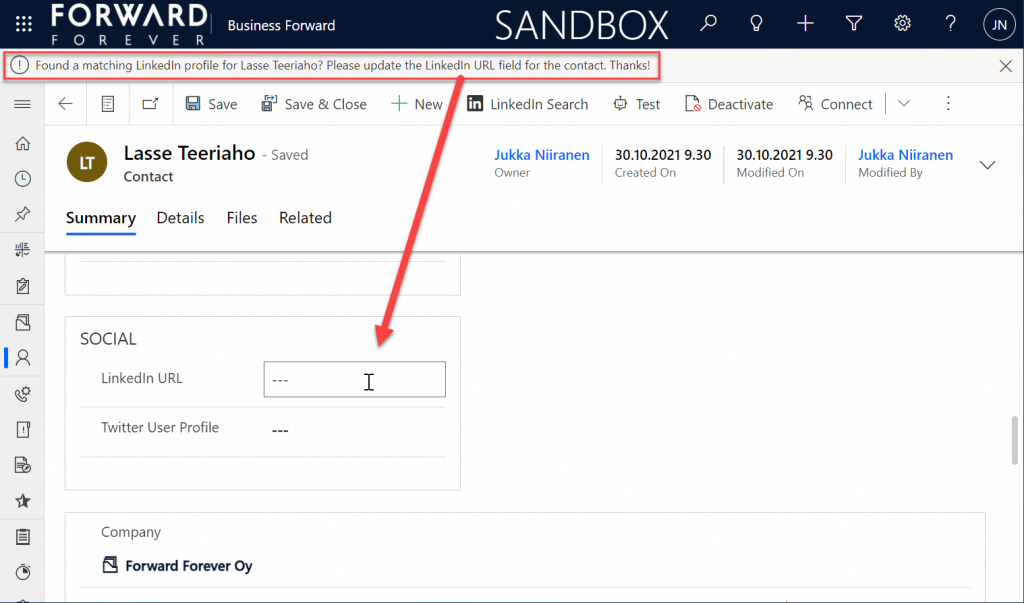
With this additional step, the OnSave event of our button 1 will therefore have two actions: launch and notify.
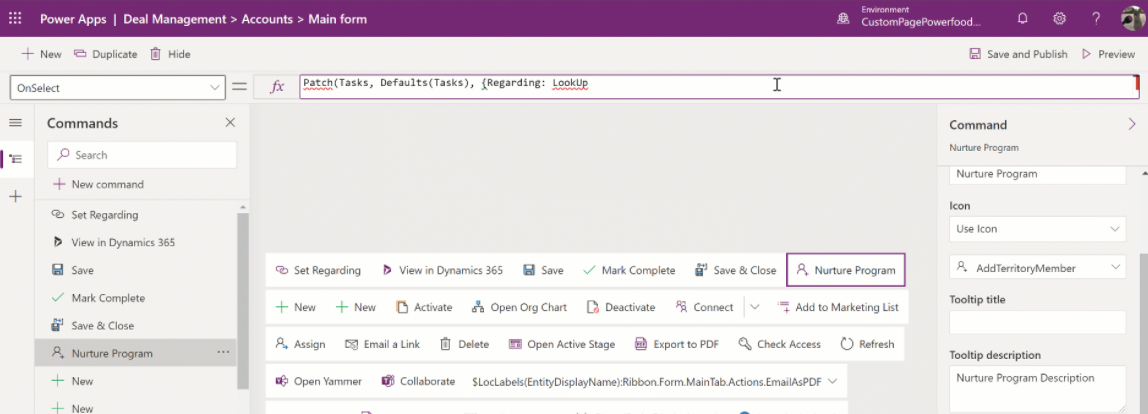
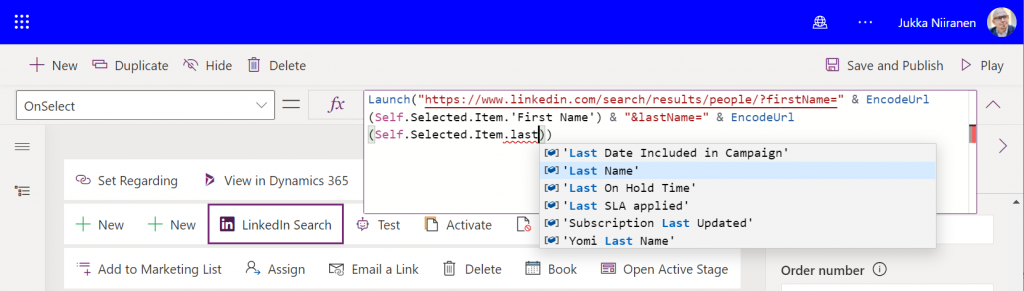
Launch("https://www.linkedin.com/search/results/people/?firstName=" & EncodeUrl(Self.Selected.Item.'First Name') & "&lastName=" & EncodeUrl(Self.Selected.Item.'Last Name'));
Notify("Found a matching LinkedIn profile for " & Self.Selected.Item.'First Name' & " " & Self.Selected.Item.'Last Name' & "? Please update the LinkedIn URL field for the contact. Thanks!")
Now we can move on to button number 2. If the contact record already has a LinkedIn URL, we’d of course want to skip the unnecessary search part and open the profile page directly.
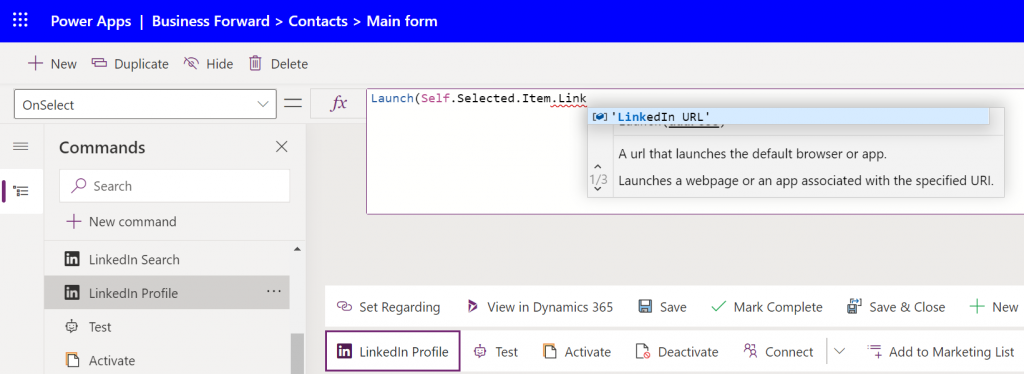
Let’s add another command bar button called “LinkedIn Profile”. The OnSelect property will be very simple this time: we just pass the Launch function a parameter containing the value of the “LinkedIn URL” field.
This second button should be visible only when the first button is not, to cover the two possible scenarios of the URL field having a value or not. While we could have conditional logic in our Power Fx to handle either scenario with a single formula, we don’t have the possibility to dynamically change the display names (or other properties) of the command bar buttons. So, two buttons with a similar feature is the approach we need to take.
How do we reverse the visibility rule? For some reason adding a simple exclamation mark before the function doesn’t work as a negation operator in a custom button Power Fx formula like it would in a Canvas app formula, so I wrote the Visible formula of the new button in a less pretty format:
If(IsBlank(Self.Selected.Item.'LinkedIn URL'), false, true)Save, publish, hit F5 a few times & wait. Now let’s open a contact record that already has the URL field filled. We see that instead of “LinkedIn Search” the command bar button now says “LinkedIn Profile”. Clicking on it takes us straight into the correct profile page:
That’s all there’s to it!
Closing thoughts
I would have actually wanted to write a bit more complex formula than this, but there are a number of limitations in the current modern commanding preview feature that have blocked my other scenarios.
For instance, there doesn’t seem to be any way currently to access the parent account information of a contact. Since under the hood it’s a customer lookup, meaning a polymorphic relationship that can reference either an account or contact record, we’d need to use the AsType function. That doesn’t appear to be supported for command bar buttons, so I couldn’t even grab the name of the company to be injected into the LinkedIn search URL to get better matches. Not a showstopper, but definitely something to add into the button once it becomes supported.
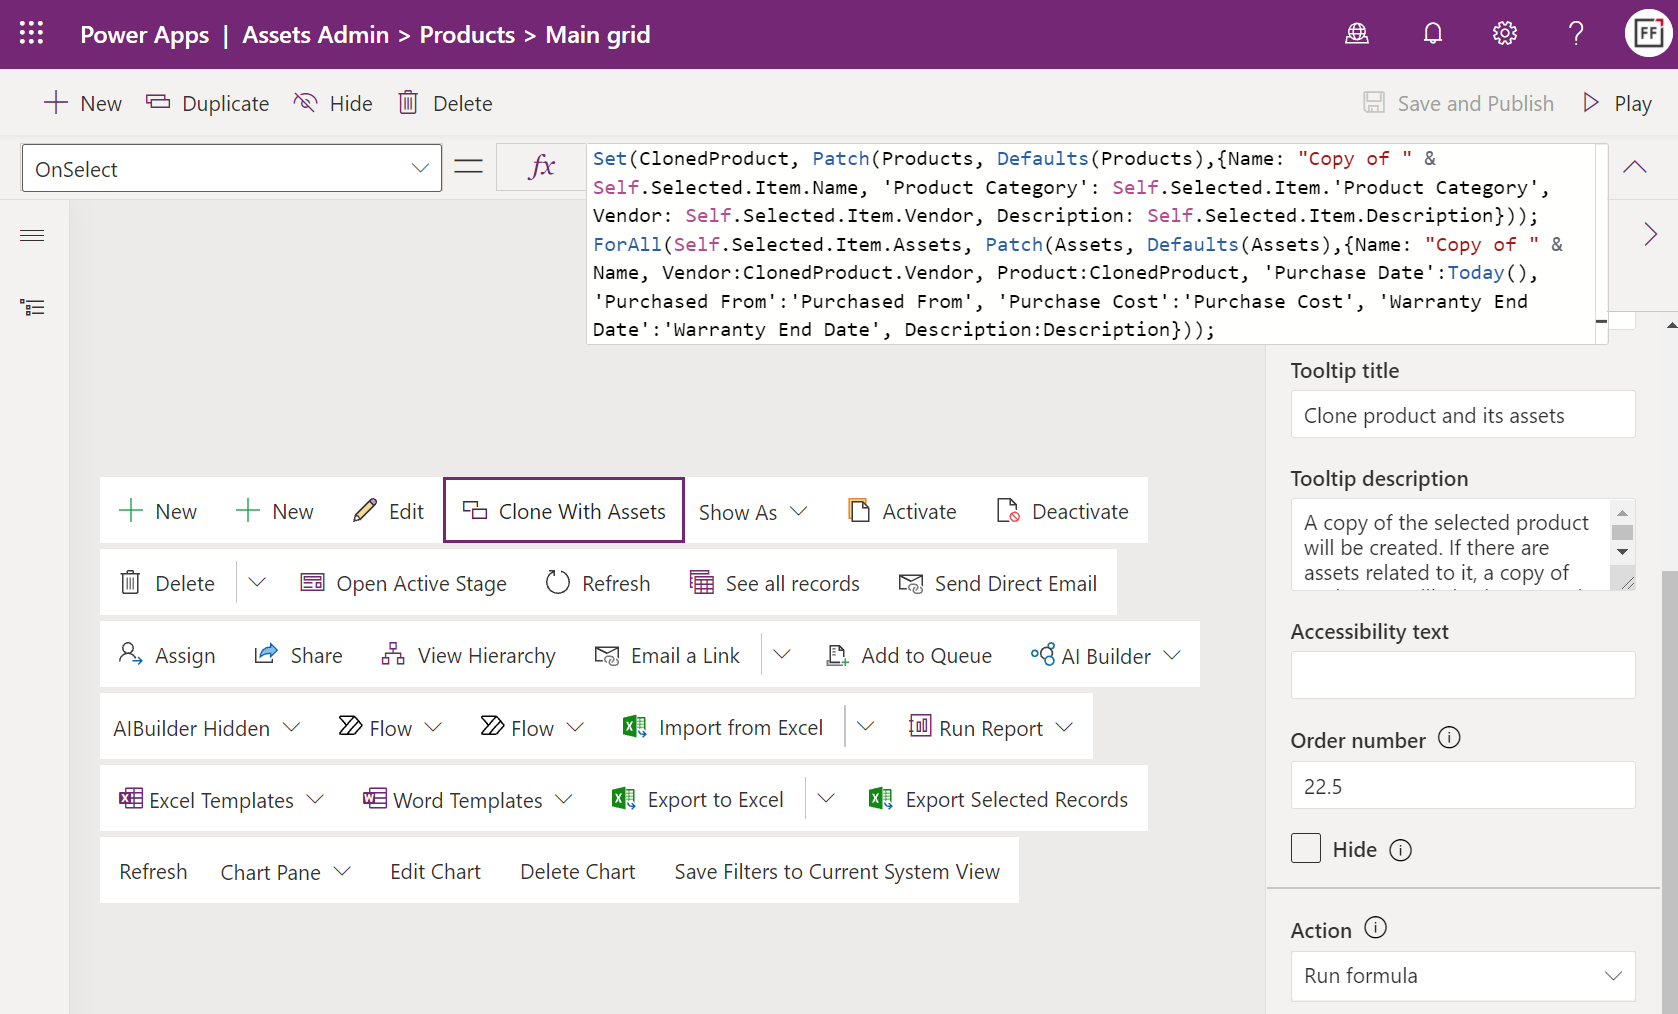
Due to its preview status, some things in custom commands that used to work earlier aren’t working anymore. The record cloning example I built three weeks ago used the Set function, but today that has been removed from the modern commanding preview supported functions. Now that we can’t use any variables, the resulting Power Fx formulas would have to be constructed via the With function. In the custom button scenarios I had originally planned to build, I can’t easily see how to build them without variables and not causing a headache for myself, so they are currently on hold until the feature matures a bit.
One question that comes to mind when building this example LinkedIn button is “why do we have to do it ourselves?” After all, Microsoft owns LinkedIn, so it would kinda make sense if there was some built-in integration at least between Dynamics 365 and LinkedIn to cover such simple profile matching scenarios. In fact, back in the April 2019 release wave an out-of-the-box integration for Dynamics 365 contacts was initially promised, but later cancelled:
Sure, there is the Relationship Sales package available at $162/user/month for those who need a hardcore social selling tool with Dynamics 365 Sales and LinkedIn Sales Navigator. Alternatively, there’s the “$0” feature built into Outlook that will show the matching LinkedIn profile previews for the contacts stored in your address book.
In between, there’s… nothing. It was interesting to reflect back on this topic by reading my own blog post from 2013 on LinkedIn, Dynamics CRM and Social Selling. The world has of course changed a lot from those days, with data privacy concerns as well as legislation affecting the ways in which this type of contact information can be exposed for commercial purposes. All the old iFrame options and LinkedIn APIs have been shut down, meaning pretty much all you can do without the paid LinkedIn plan is to create a low-code shortcut button like the one I showed in this article.